Step 1 – Install Docker
Step 2 – Install Zabbix Agent 2
Step 3 – Configure Zabbix Agent 2
Step 4 – Fix the permission
Zabbix Agent(/usr/sbin/zabbix_agentd) and Zabbix Server(/usr/sbin/zabbix_server) run with a user called “zabbix”. Docker monitoring commands can be run only by the user if root or a user which is part of linux group called “docker”. thus, For the Zabbix agent to keep an eye on Docker containers, you need to add the Zabbix user, which is installed by default, to the docker group.
$ sudo usermod -aG docker zabbix
Step 5 – ReStart a Zabbix Agent
$ sudo systemctl restart zabbix-agent2
$ sudo systemctl enable zabbix-agent2
$ sudo systemctl status zabbix-agent2
Step 6 – Add the Docker Host to Zabbix Server for Monitoring
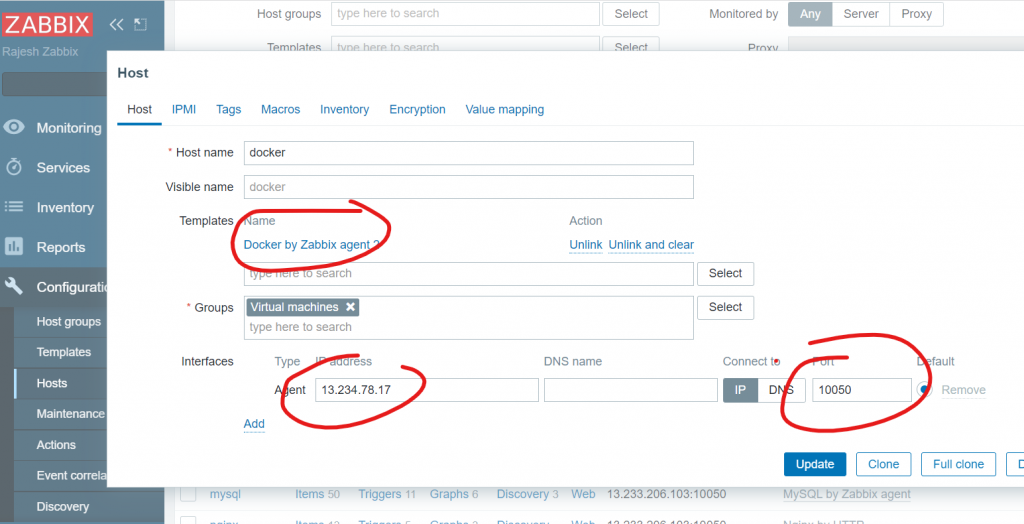
Step 7 – Add the Docker Host with zabbix template “Docker by Zabbix agent”
Step 8 – Create a few Dummy containers in Docker host
$ docker run -itd ubuntu
$ docker run -itd ubuntu
$ docker run -itd ubuntu
Step 9 – Validate Docker metrices at Zabbix front end Latest data.
Now head back to the Zabbix server dashboard. Click on ‘Monitoring’ then ‘Hosts’. Click on the name of your Docker server and in the menu option that appears, select ‘Latest data’.


Mentor for DevOps - DevSecOps - SRE - Cloud - Container & Micorservices at Software AG
Join my following certification courses...
- DevOps Certified Professionals (DCP)
- Site Reliability Engineering Certified Professionals (SRECP)
- Master in DevOps Engineering (MDE)
- DevSecOps Certified Professionals (DSOCP)
URL - https://www.devopsschool.com/certification/
My Linkedin - https://www.linkedin.com/in/rajeshkumarin
- DevOps Certified Professionals (DCP)
- Site Reliability Engineering Certified Professionals (SRECP)
- Master in DevOps Engineering (MDE)
- DevSecOps Certified Professionals (DSOCP)
URL - https://www.devopsschool.com/certification/
My Linkedin - https://www.linkedin.com/in/rajeshkumarin
Latest posts by Rajesh Kumar (see all)
- DevOps Foundation Certification - August 29, 2024
- SRE Foundation Certification - August 29, 2024
- Best Medical Tourism Company in the World - August 28, 2024