Step 1 – Create a Volume
Step 2 – Attach a Volume to EC2 Instance
Step 3 – Verify if Volume is attached or not
Verify if Volume is attached or not by running linux command in Ec2-instance
$ lsblk
Step 4 – Check if the volume has any data using the following command.
If the above command output shows “/dev/xvdf: data“, it means your volume is empty.
$ sudo file -s /dev/xvdf
Step 5: Format the volume to the ext4 filesystem using the following command.
Alternatively, you can also use the xfs format. You have to use either ext4 or xfs.
$ sudo mkfs -t ext4 /dev/xvdf
$ sudo mkfs -t xfs /dev/xvdf
Step 6: Create a directory of your choice to mount our new ext4 volume. I am using the name “newvolume“. You can name it something meaningful to you.
$ sudo mkdir /newvolume
Step 7: Mount the volume to “newvolume” directory using the following command.
$ sudo mount /dev/xvdf /newvolume/
Step 8: cd into newvolume directory and check the disk space to validate the volume mount.
$ cd /newvolume
$ df -h .
The above command should show the free space in the newvolume directory.
To unmount the volume, use the unmount command as shown below..
umount /dev/xvdf
Mount one EBS volume to Multiple EC2 Instances
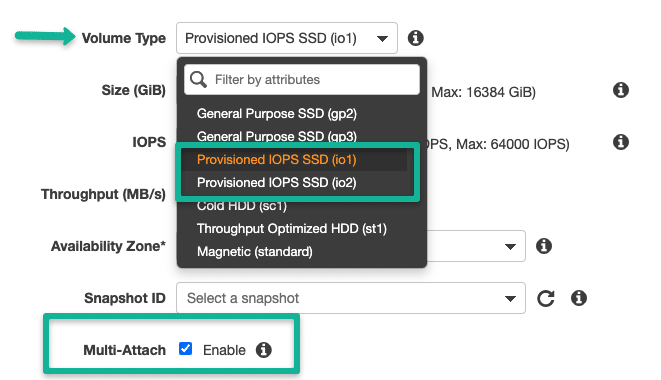
If you have any use case to mount an EBS volume to multiple ec2 instances, you can do it via EBS multi-attach functionality.
This option only serves specific use-cases where multiple machines need to read/write to the same storage location concurrently.
EBS multi attach option is available only for Provisioned IOPS (PIOPS) EBS volume types.

Note: EBS multi-attach does not support
XFS,EXT2,EXT4, andNTFSfile systems. It supports only cluster-aware file systems.
I’m a DevOps/SRE/DevSecOps/Cloud Expert passionate about sharing knowledge and experiences. I am working at Cotocus. I blog tech insights at DevOps School, travel stories at Holiday Landmark, stock market tips at Stocks Mantra, health and fitness guidance at My Medic Plus, product reviews at I reviewed , and SEO strategies at Wizbrand.
Please find my social handles as below;
Rajesh Kumar Personal Website
Rajesh Kumar at YOUTUBE
Rajesh Kumar at INSTAGRAM
Rajesh Kumar at X
Rajesh Kumar at FACEBOOK
Rajesh Kumar at LINKEDIN
Rajesh Kumar at PINTEREST
Rajesh Kumar at QUORA
Rajesh Kumar at WIZBRAND

 Starting: 1st of Every Month
  +91 8409492687
  Contact@DevOpsSchool.com
