Step 1 –
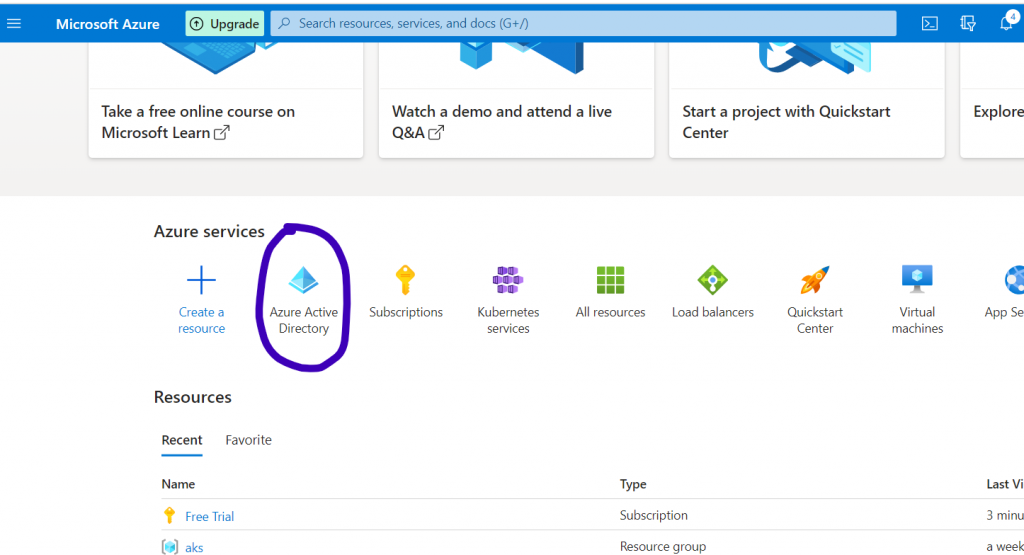
Step 2 –
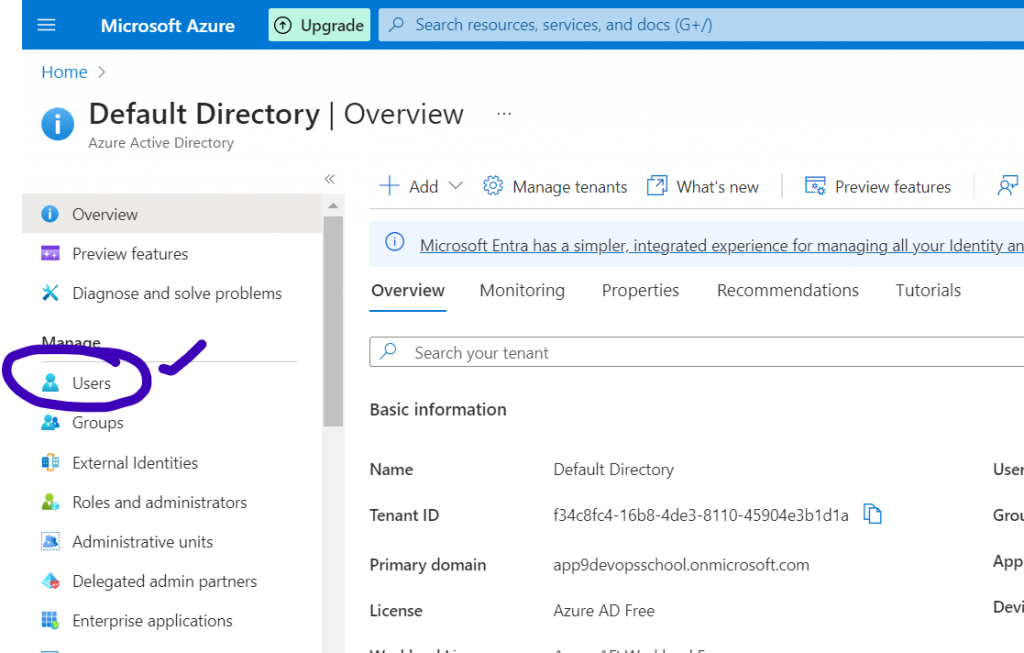
Step 3 –
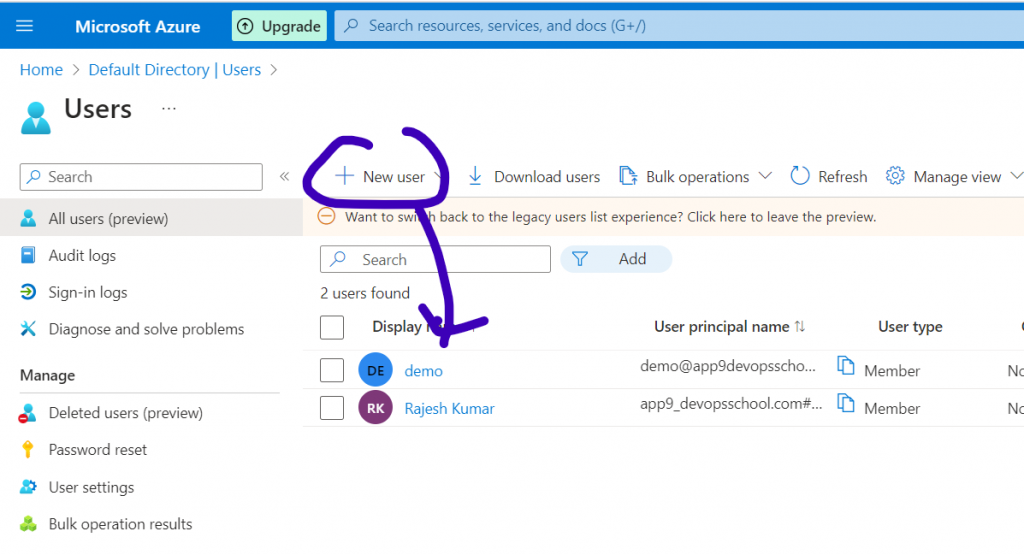
Step 4 –
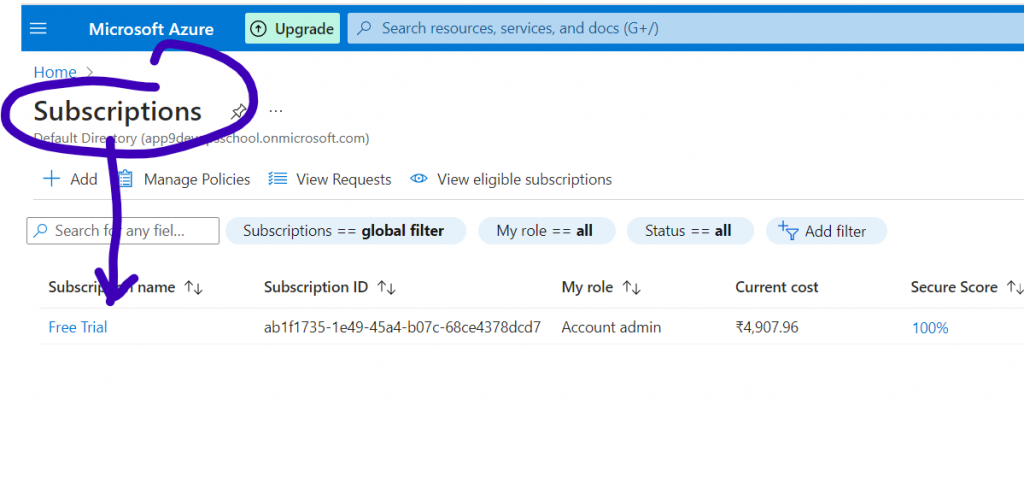
Step 5 –
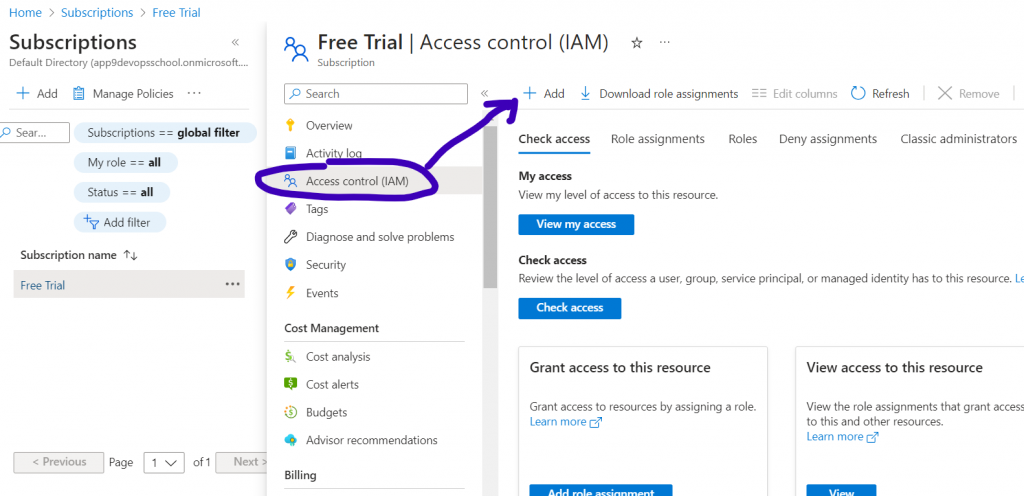
Step 6 –
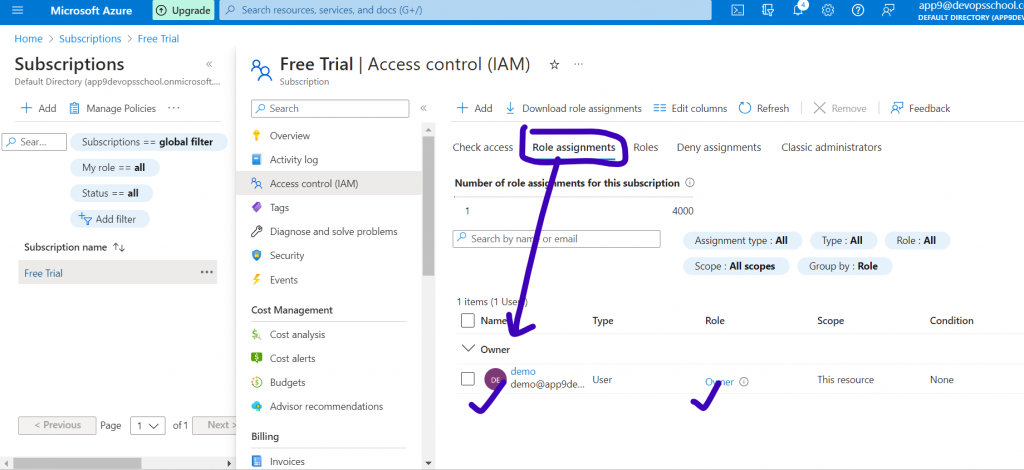
To add a new user in Azure IAM (Identity and Access Management), you can follow these steps:
- Sign in to the Azure portal at https://portal.azure.com using your Azure account credentials.
- In the Azure portal, search for and select “Azure Active Directory” from the available services.
- In the Azure Active Directory (AAD) blade, select “Users” from the left-hand menu.
- Click on the “+ New user” button at the top of the Users blade.
- In the “User” blade, provide the required information for the new user:
- User name: Enter a unique username for the new user.
- Name: Specify the full name of the user.
- First name: Enter the user’s first name.
- Last name: Provide the user’s last name.
- Password: Choose whether to assign a password to the user or let the user create their own password during the first sign-in.
- Optionally, you can also configure the following settings for the new user:
- User assignment type: Choose between “Member” and “Guest” based on whether the user belongs to your organization or is an external collaborator.
- Role: Select the appropriate role for the user. You can assign a pre-defined role or create a custom role.
- Usage location: Specify the user’s usage location, which is relevant for compliance and data residency requirements.
- After filling in the required information and configuring the desired settings, click on the “Create” button to create the new user.
The new user will be added to your Azure Active Directory, and you can manage their access and permissions from the Azure portal. The user will receive a notification email with instructions on how to complete the account setup and set a password (if not assigned during user creation).
I’m a DevOps/SRE/DevSecOps/Cloud Expert passionate about sharing knowledge and experiences. I am working at Cotocus. I blog tech insights at DevOps School, travel stories at Holiday Landmark, stock market tips at Stocks Mantra, health and fitness guidance at My Medic Plus, product reviews at I reviewed , and SEO strategies at Wizbrand.
Please find my social handles as below;
Rajesh Kumar Personal Website
Rajesh Kumar at YOUTUBE
Rajesh Kumar at INSTAGRAM
Rajesh Kumar at X
Rajesh Kumar at FACEBOOK
Rajesh Kumar at LINKEDIN
Rajesh Kumar at PINTEREST
Rajesh Kumar at QUORA
Rajesh Kumar at WIZBRAND

 Starting: 1st of Every Month
  +91 8409492687
  Contact@DevOpsSchool.com
