In this tutorial, we’re going learn how to add authentication via Facebook to a Laravel app. In Short, How to add Sign-in with Facebook feature in our Laravel Project. For that, we use Laravel Socialite Package which is officially provided by Laravel (you can check Documentation here.)
Socialite supports Facebook, Twitter, LinkedIn, Google, GitHub and Bitbucket.
Note :- For using Socialite Package, you must have Laravel 5.4 or an Upper version of Laravel in your project. (Recommended 5.5 and above.)
I’m using Laravel 5.8 (version) in my project. So Follow the below Steps to add Sign-in with Facebook Functionality in your existing Laravel Project.
Step 1 :- Install Socialite using composer by below Command.
composer require laravel/socialite
Step 2 :- Go to config/services.php and add a new Package as below.
‘Facebook’ => [
‘client_id’ => ‘FACEBOOK_CLIENT_ID’,
‘client_secret’ => ‘FACEBOOK_CLIENT_SECRET’,
‘redirect’ => ‘http://your-callback-url’,
],
We’ll obtain client_id, client_secret and redirect URL in next Step.
Since we added a new package, make sure to add to the service providers array in config/app.php (In providers array)
‘providers’ => [
// Other service providers…
Laravel\Socialite\SocialiteServiceProvider::class,
],
Add an alias in config/app.php, so it is easier to reference later.
‘Socialite’ => Laravel\Socialite\Facades\Socialite::class,
Step 3 :- Now, Create your app on Facebook.
( i ) Create a Project :- Go to https://developers.facebook.com/ and click on My Apps and then Create App as shown below.

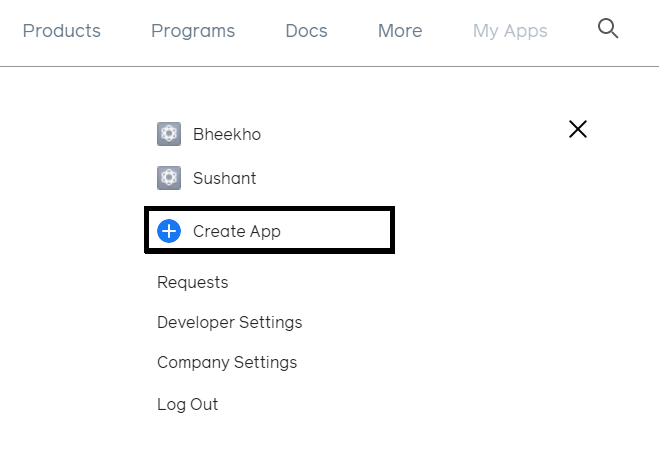
After Clicking on Create App a pop-up appears like this (See below Image) :-
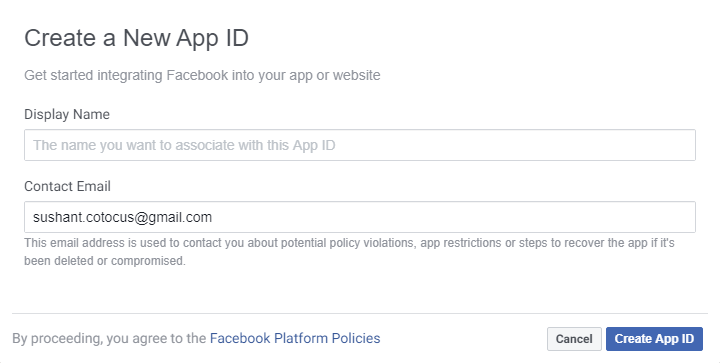
In Which Fill the Display Name (Your App Name) and click on Create App ID. A Security check pop-up appears just pass it, and you are redirected to the App Dashboard.
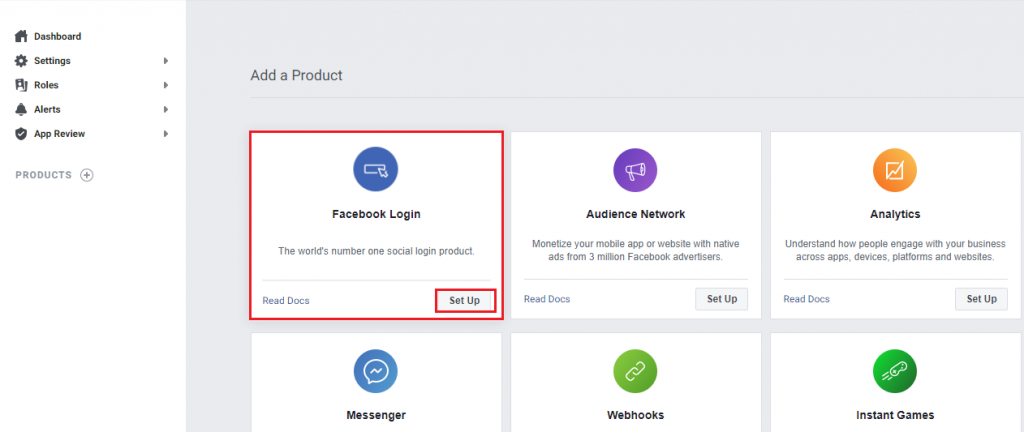
Now Click on Facebook Login Set-up and then click on WWW(web) see Below image
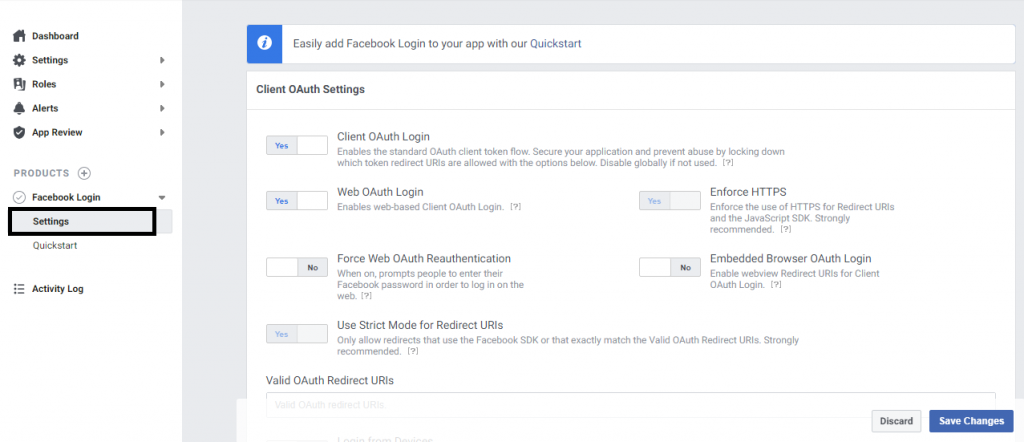
After that Click on Settings in the left side, Fill Redirect_URL and then click on Save Changes. See the below image for help. :-
Redirect URL is like your_web_URL/login/facebook/callback
After that click on Settings–>Basic below Dashboard where you can find Your_App_ID and Your_App_Secret. See the Below Image.
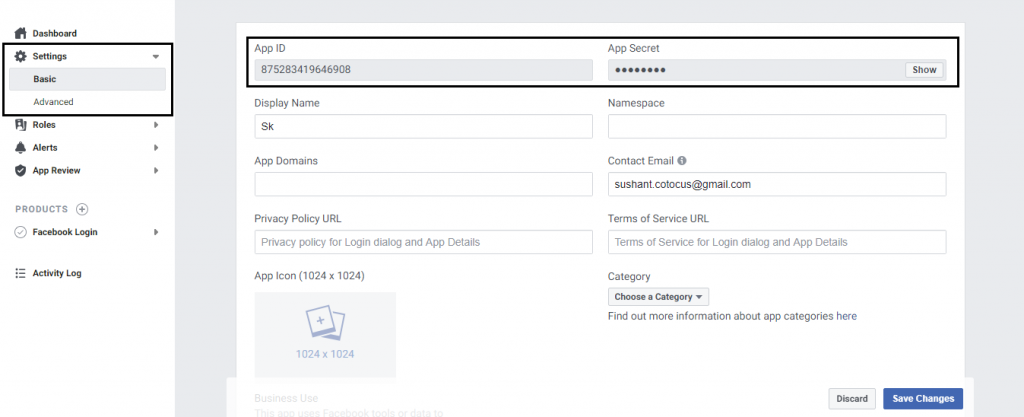
just copy and paste it in the config/services.php as mentioned in Step 2.
Step 4 :- Handle the route. Go to routes/web.php. See the below code.
Route::get(‘login/facebook’, ‘Auth\LoginController@redirectToProvider’);
Route::get(‘login/facebook/callback’, ‘Auth\LoginController@handleProviderCallback’);
Step 5 :- Now go to loginController and paste the below code.
use Socialite;
public function redirectToProvider()
{
return Socialite::driver(‘facebook’)->stateless()->redirect();
}
public function handleProviderCallback()
{
$user = Socialite::driver(‘facebook’)->user();
// $user->token; (return as your need)
}
Step 6 :- Now, we make Sign-in with Facebook button. Just copy and paste the below code in your login page.
| <a href="{{ url('login/facebook')}}" class="btn btn-neutral btn-icon"> | |
| <span class="btn-inner--icon"><img src="{{asset('Icons/facebooke.svg')}}"></span> | |
| <span class="btn-inner--text">Facebook </span> | |
| </a> |
Note :- You can use fa-fa icon of facebook instead of facebook.svg or download it by searching on google by Keyword facebook SVG icon download.
Thats All. ???
With MotoShare.in, you can book a bike instantly, enjoy doorstep delivery, and ride without worries. Perfect for travelers, professionals, and adventure enthusiasts looking for a seamless mobility solution.

 Starting: 1st of Every Month
  +91 8409492687
  Contact@DevOpsSchool.com
 by
by 