The Apache check tracks requests per second, bytes served, number of worker threads, service uptime, and more.
The following metrics will be tracked by this integration:
| Name | Units | Description |
|---|---|---|
| apache.conns_async_closing | connections | The number of asynchronous closing connections. |
| apache.conns_async_keep_alive | connections | The number of asynchronous keep alive connections. |
| apache.conns_async_writing | connections | The number of asynchronous writes connections. |
| apache.conns_total | connections | The total number of connections performed. |
| apache.net.bytes | bytes | The total number of bytes served. |
| apache.net.bytes_per_s | bytes/second | The number of bytes served per second. |
| apache.net.hits | requests | The total number of requests performed. |
| apache.net.request_per_s | requests/second | The number of requests performed per second. |
| apache.performance.busy_workers | threads | The number of workers serving requests. |
| apache.performance.cpu_load | percent | The percent of CPU used. |
| apache.performance.idle_workers | threads | The number of idle workers. |
| apache.performance.uptime | seconds | The amount of time the server has been running. |
Step 1 – Install Datadog Agent in Centos OR Ubuntu OR Windows
Step 2 – Install Apache HTTPD server in Ubuntu OR Centos/Redhat OR Windows
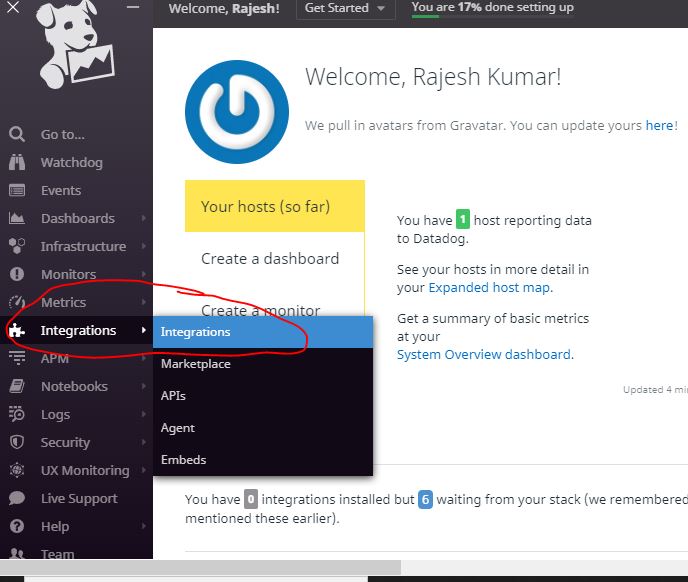
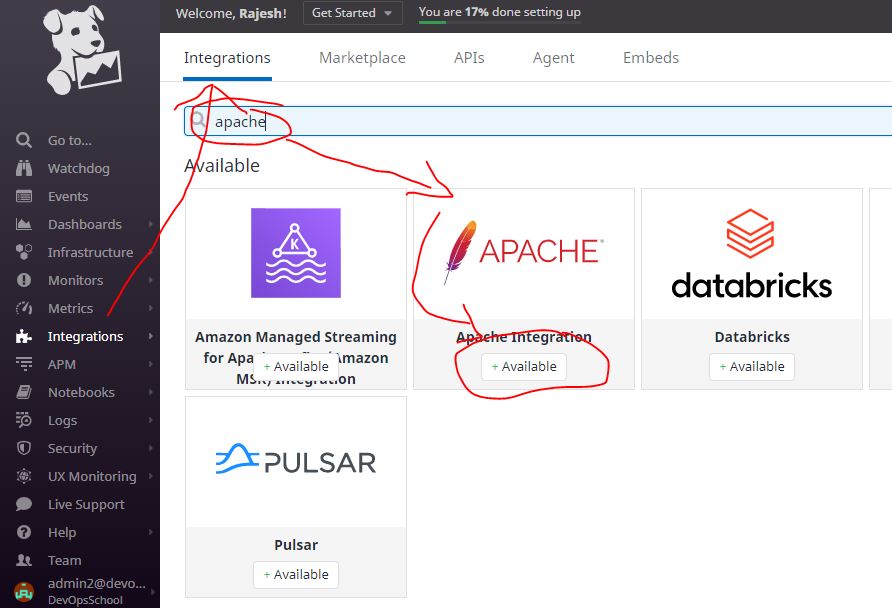
Step 3 – Click on the Integrations using Left bar Navigations as shown below
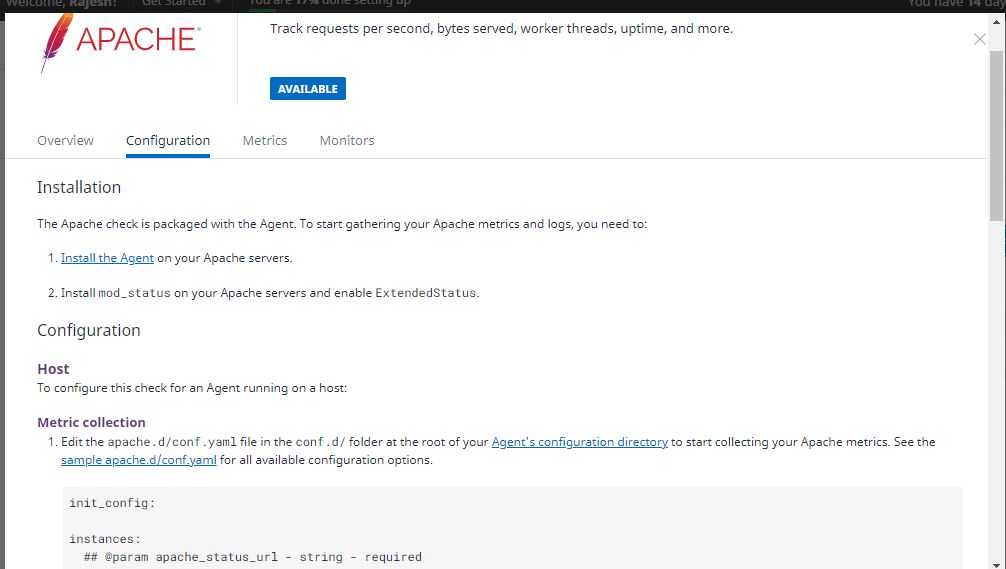
Step 4 – Enable mod_status & ExtendedStatus in Apache
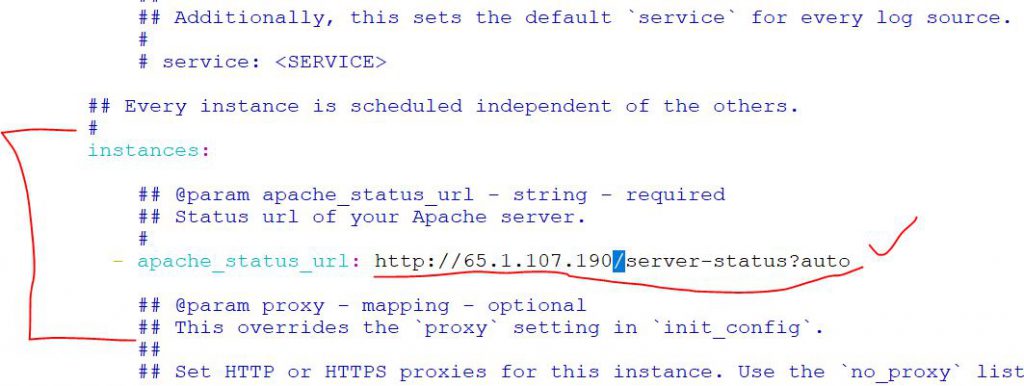
Step 5 – Enable Datadog Apache Integration configuration to start collecting your Apache metrics.
$ cd /etc/datadog-agent/conf.d/apache.d/
$ sudo cp conf.yaml.example conf.yaml
$ sudo vi conf.yaml (CHECK IMAGE BELOW)
$ sudo service datadog-agent restart [UBUNTU]
$ sudo systemctl restart datadog-agent [Centos and Ubuntu]

$ watch curl http://65.1.107.190/ [ GENERATE FAKE LOAD ON APACHE SERVER ]
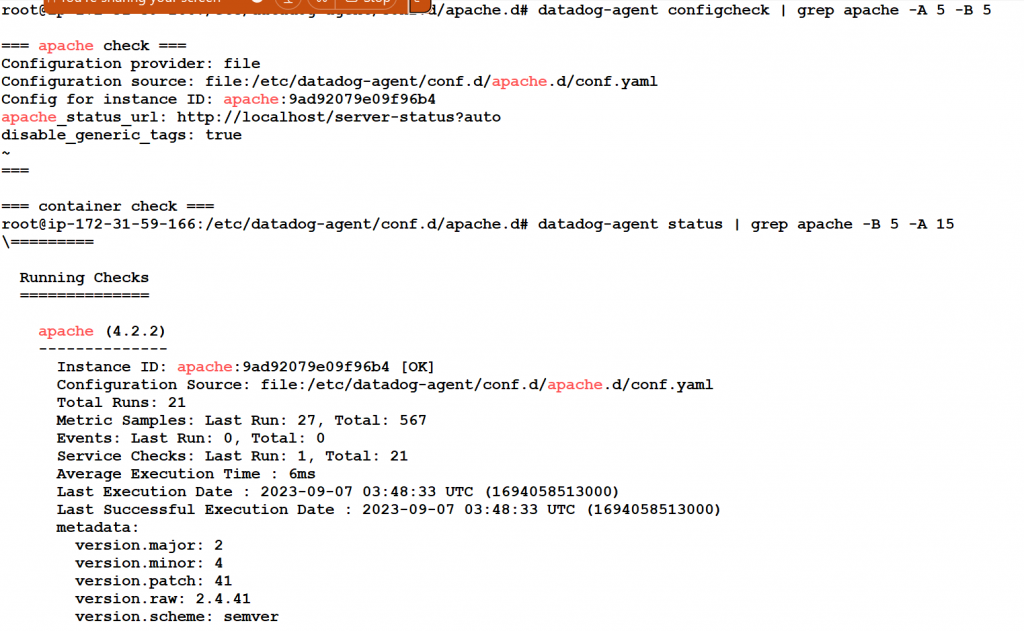
Step 6 – How to make sure if Datadog Agent is monitoring Apache
$ datadog-agent configcheck | grep apache -A 5 -B 5

=== apache check ===
Configuration provider: file
Configuration source: file:/etc/datadog-agent/conf.d/apache.d/conf.yaml
Config for instance ID: apache:9ad92079e09f96b4
apache_status_url: http://localhost/server-status?auto
disable_generic_tags: true
~

$ datadog-agent status | grep apache -B 5 -A 15
=========

  Running Checks
  ==============

    apache (4.2.2)
    --------------
      Instance ID: apache:9ad92079e09f96b4 [OK]
      Configuration Source: file:/etc/datadog-agent/conf.d/apache.d/conf.yaml
      Total Runs: 17
      Metric Samples: Last Run: 27, Total: 459
      Events: Last Run: 0, Total: 0
      Service Checks: Last Run: 1, Total: 17
      Average Execution Time : 7ms
      Last Execution Date : 2023-09-07 03:47:33 UTC (1694058453000)
      Last Successful Execution Date : 2023-09-07 03:47:33 UTC (1694058453000)
      metadata:
        version.major: 2
        version.minor: 4
        version.patch: 41
        version.raw: 2.4.41
        version.scheme: semver
Step 7 – Click on “Install Integration” as show in image below; [ Obselete in Current version of Datadog ]

Step 7 – Create a fake Traffic on Apache
$ while true; do curl -s -o /dev/null http://localhost & done
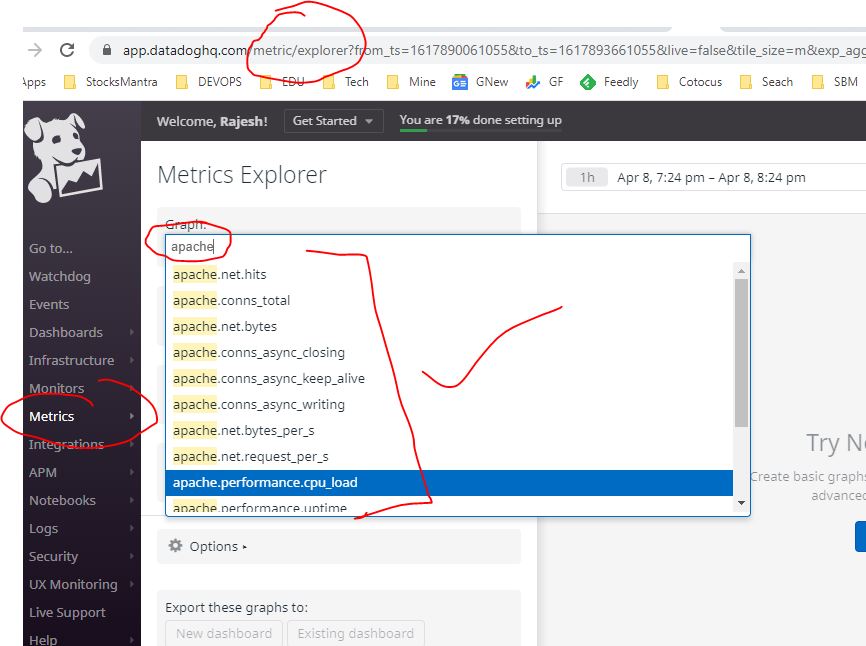
Step 7 – Verify the Apache Metrix on Datadog Console
I’m a DevOps/SRE/DevSecOps/Cloud Expert passionate about sharing knowledge and experiences. I am working at Cotocus. I blog tech insights at DevOps School, travel stories at Holiday Landmark, stock market tips at Stocks Mantra, health and fitness guidance at My Medic Plus, product reviews at I reviewed , and SEO strategies at Wizbrand.
Please find my social handles as below;
Rajesh Kumar Personal Website
Rajesh Kumar at YOUTUBE
Rajesh Kumar at INSTAGRAM
Rajesh Kumar at X
Rajesh Kumar at FACEBOOK
Rajesh Kumar at LINKEDIN
Rajesh Kumar at PINTEREST
Rajesh Kumar at QUORA
Rajesh Kumar at WIZBRAND

 Starting: 1st of Every Month
  +91 8409492687
  Contact@DevOpsSchool.com
