What is mod_status?
mod_status is an Apache module that helps to monitor web server load and current httpd connections with an HTML interface that can be accessed via a web browser.
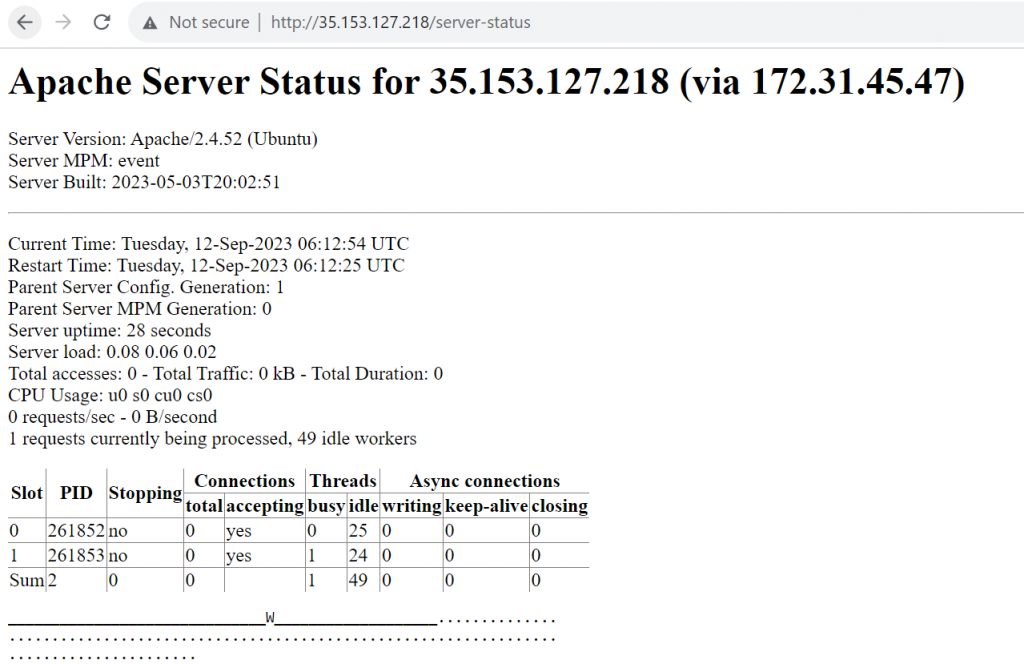
Apache’s mod_status shows a plain HTML page containing the information about current statistics of the webserver including.
- Total number of incoming requests
- Total number of bytes and counts server
- The CPU usage of Webserver
- Server Load
- Server Uptime
- Total Traffic
- Total number of idle workers
- PIDs with the respective clients and many more.
The default Apache Project enabled their server statistics page to the general public. To have a demo of the busy web site’s status page, visit.
How to Enable mod_status in Apache in Centos/Redhat?
$ sudo vi /etc/httpd/conf/httpd.conf

DocumentRoot "/var/www/html"
LoadModule status_module modules/mod_status.so
<Location /server-status>
   SetHandler server-status
   Order deny,allow
   Deny from all
   Allow from all
   Allow from 172.31.0.16
</Location>
ExtendedStatus On

$ httpd -t
$ sudo systemctl restart httpd
$ curl http://localhost/server-status
$ curl http://localhost/server-status/?refresh=5
How to Enable mod_status in Apache in Ubuntu?
Step - 1 - By default, Apache ships with the mod_status module already enabled. You can verify this by checking the mods_enabled directory by running ls command as shown:

$ ls /etc/apache2/mods-enabled | grep status*
status.conf
status.load

Step - 2 - Ensure that the status.conf and status.load files are present. If not, you need to enable mod_status module by invoking the command:

$ sudo /usr/sbin/a2enmod status

Step 3 - Configure mod_status in Apache Ubuntu
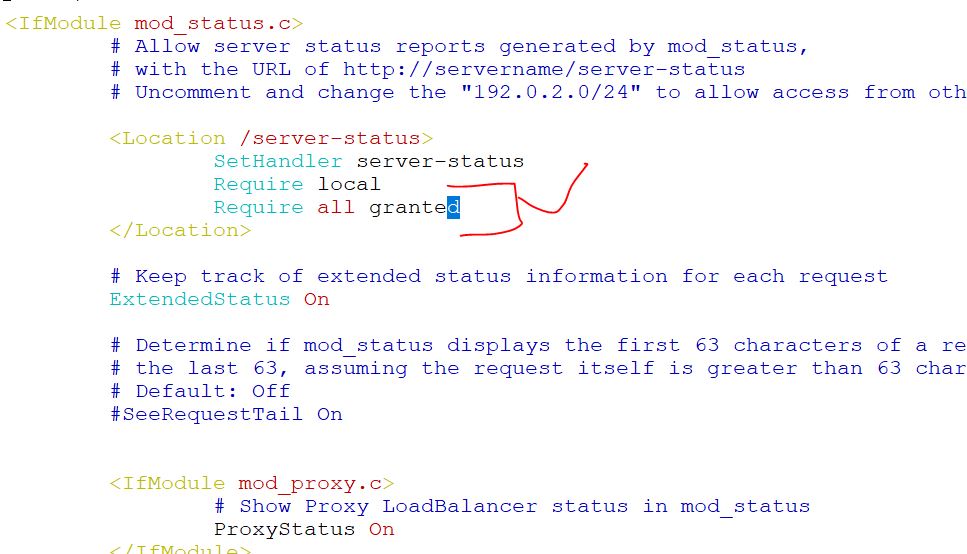
As stated earlier, the mod_status is already enabled. However, additional tweaks are required for you to access the server-status page. To do so, you need to modify the status.conf file.

$ sudo vi /etc/apache2/mods-enabled/status.conf

Refer a image below

Set the Require ip directive to reflect the IP address of the machine that you will be accessing the server from.

Step 4 - Save the changes and restart Apache for the changes to take effect to confirm the status as shown:

$ sudo systemctl restart apache2
$ sudo systemctl status apache2
$ curl http://server-ip/server-status
$ curl http://server-ip/server-status?refresh=5

I’m a DevOps/SRE/DevSecOps/Cloud Expert passionate about sharing knowledge and experiences. I am working at Cotocus. I blog tech insights at DevOps School, travel stories at Holiday Landmark, stock market tips at Stocks Mantra, health and fitness guidance at My Medic Plus, product reviews at I reviewed , and SEO strategies at Wizbrand.
Please find my social handles as below;
Rajesh Kumar Personal Website
Rajesh Kumar at YOUTUBE
Rajesh Kumar at INSTAGRAM
Rajesh Kumar at X
Rajesh Kumar at FACEBOOK
Rajesh Kumar at LINKEDIN
Rajesh Kumar at PINTEREST
Rajesh Kumar at QUORA
Rajesh Kumar at WIZBRAND

 Starting: 1st of Every Month
  +91 8409492687
  Contact@DevOpsSchool.com
