In this blog I am going to show you how to Install PHP 7 in Windows 10:
so, First thing you need to go show be in below
https://windows.php.net/download
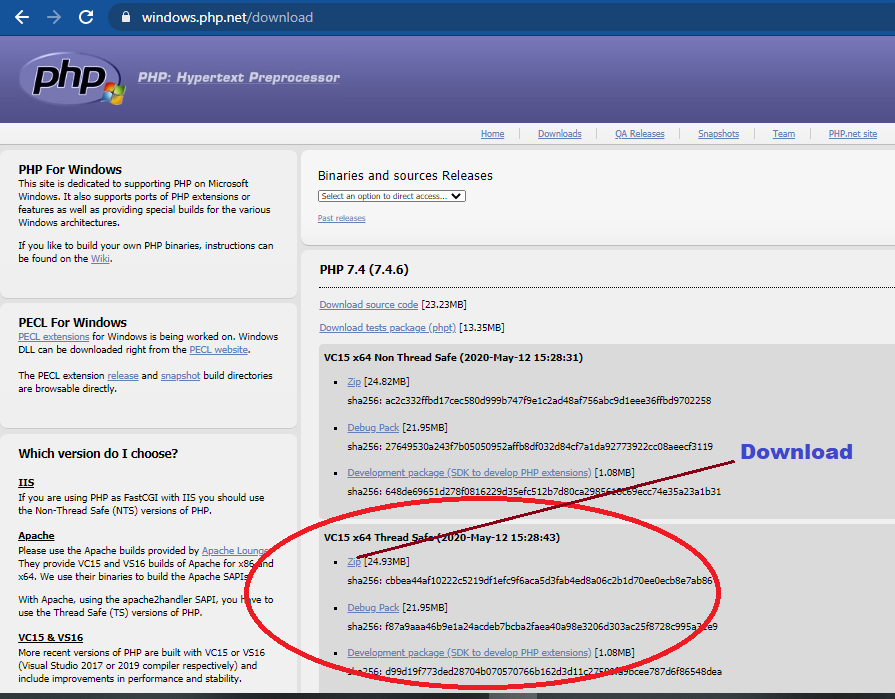
Click on the Download link after that extract zip file in file explorer (Drive C) and create any file (PHP7).
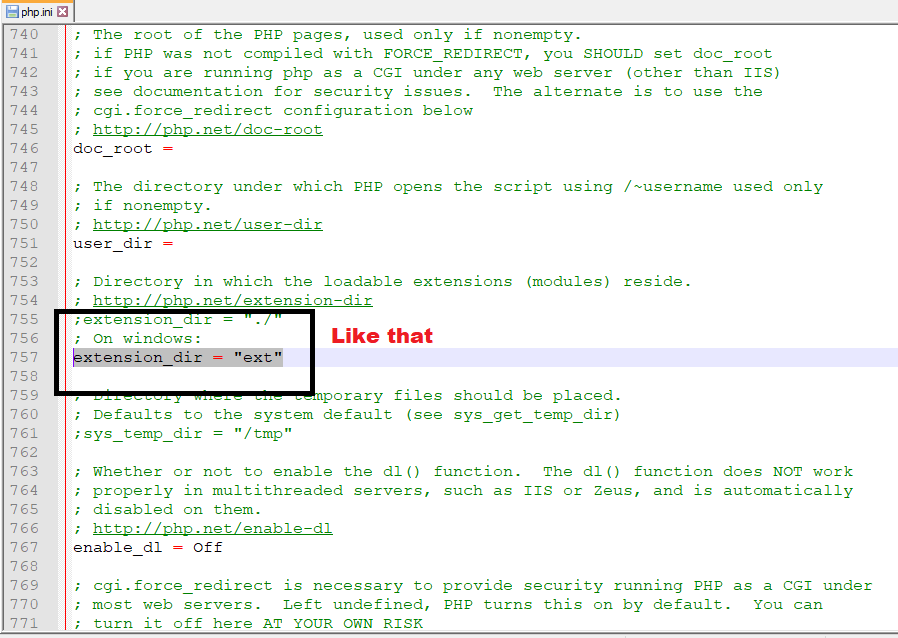
Before copy this file “php-Copy.ini-development” and convert rename to “php.ini” after that open this file in the editor and find “extension_dir” and delete before; of a word like that (extension_dir = “ext”). So, when you download the original file line have ; just like that you can delete (uncomment) as.
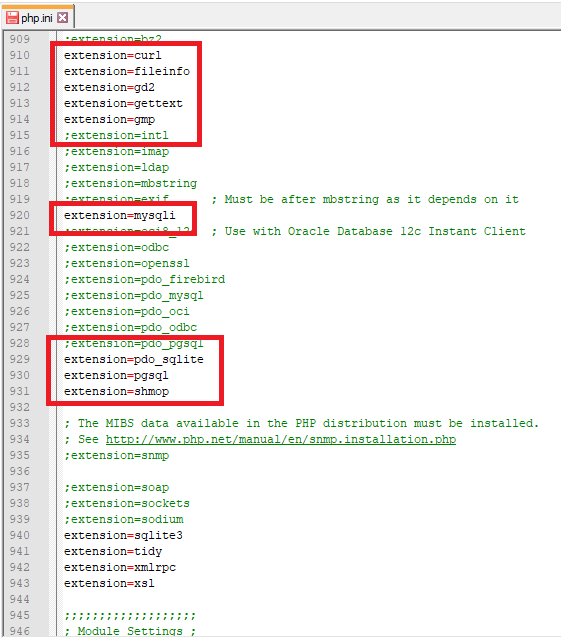
you can also scroll down and you preferred like this img and uncomment this line and save this file
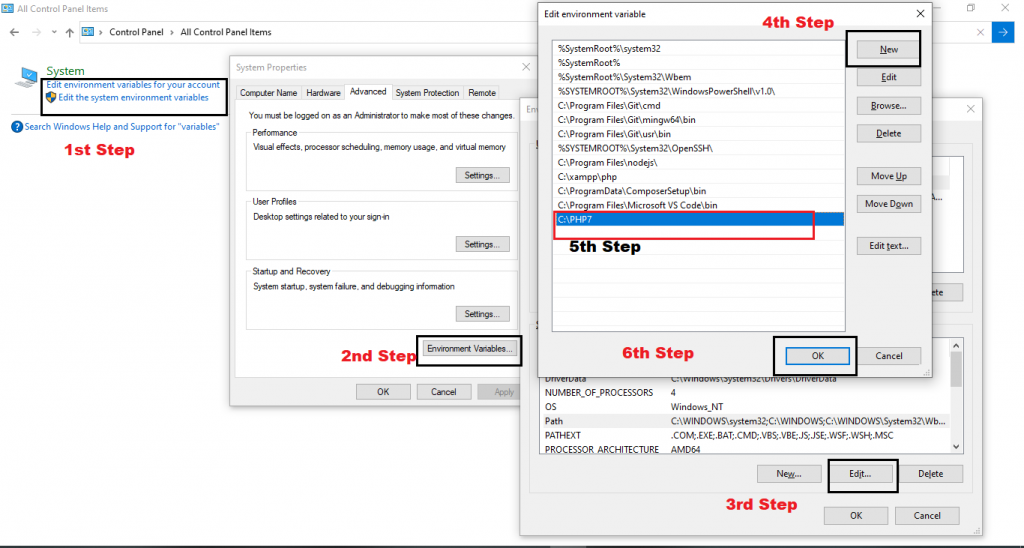
Go to control panel and type “variable” and you will this right system variable and open window on the popup and click on “environmental Variables” and scroll down and you will see “Path” and click on “edit” and “new” add path like that “C:\PHP7” exactly like created file in “C drive” after that click “ok“
Complete this process and “restart system” and open “Command Prompt” to check php version type “php -v“
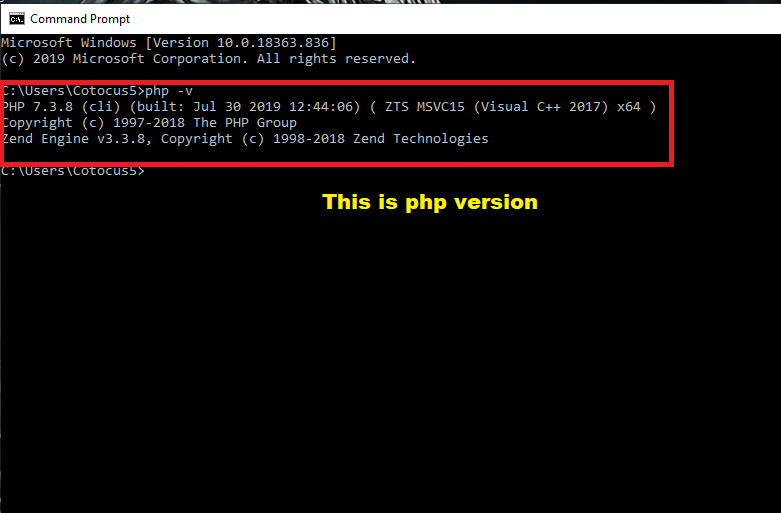
You should something like this. It means you installed php correctly.
I’m a DevOps/SRE/DevSecOps/Cloud Expert passionate about sharing knowledge and experiences. I have worked at Cotocus. I share tech blog at DevOps School, travel stories at Holiday Landmark, stock market tips at Stocks Mantra, health and fitness guidance at My Medic Plus, product reviews at TrueReviewNow , and SEO strategies at Wizbrand.
Do you want to learn Quantum Computing?
Please find my social handles as below;
Rajesh Kumar Personal Website
Rajesh Kumar at YOUTUBE
Rajesh Kumar at INSTAGRAM
Rajesh Kumar at X
Rajesh Kumar at FACEBOOK
Rajesh Kumar at LINKEDIN
Rajesh Kumar at WIZBRAND
Find Trusted Cardiac Hospitals
Compare heart hospitals by city and services — all in one place.
Explore Hospitals
