
 Starting: 1st of Every Month
  +91 8409492687
  Contact@DevOpsSchool.com
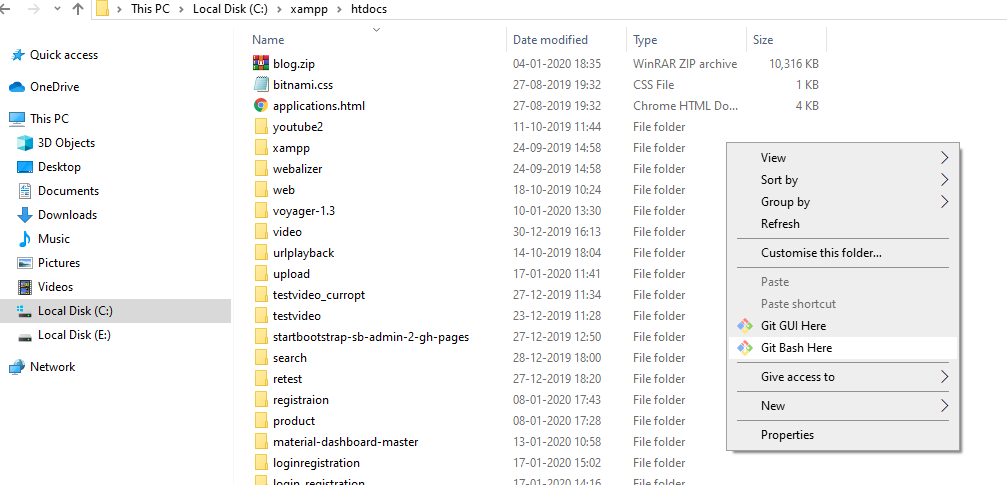
Step: 1- First of all you have to go:-

Step:2- then right-click in this Drive and got to Git Bas Here and click.
Step:3-run the composer

step: 4- write the project name. then press Enter. it will take time for this run this project

Step:5- The next step go to inside the project folder and click the Git base Here and write php artisan serve . and Enter

And copy the url like that: http://127.0.0.1:8000/ run this url in the web browser.
Step:6- see the pic

Step:7- now we need to create a File model.

Step:8- migrations using the following command.

Step:9– Create the file table.
| <?php | |
| use Illuminate\Support\Facades\Schema; | |
| use Illuminate\Database\Schema\Blueprint; | |
| use Illuminate\Database\Migrations\Migration; | |
| class CreateFilesTable extends Migration | |
| { | |
| /** | |
| * Run the migrations. | |
| * | |
| * @return void | |
| */ | |
| public function up() | |
| { | |
| Schema::create('files', function (Blueprint $table) { | |
| $table->increments('id'); | |
| $table->integer('user_id')->unsigned()->index(); | |
| $table->string('title'); | |
| $table->text('overview'); | |
| $table->decimal('price', 6, 2); | |
| $table->timestamps(); | |
| $table->softDeletes(); | |
| $table->foreign('user_id') | |
| ->references('id') | |
| ->on('users') | |
| ->onDelete('cascade'); | |
| }); | |
| } | |
| /** | |
| * Reverse the migrations. | |
| * | |
| * @return void | |
| */ | |
| public function down() | |
| { | |
| Schema::dropIfExists('files'); | |
| } | |
| } |
 by
by Step:9- File.php, write the following code.
| <?php | |
| namespace App; | |
| use Illuminate\Database\Eloquent\Model; | |
| use Illuminate\Database\Eloquent\SoftDeletes; | |
| class File extends Model | |
| { | |
| use SoftDeletes; | |
| protected $fillable = [ | |
| 'title', | |
| 'overview', | |
| 'price' | |
| ]; | |
| public function user() | |
| { | |
| return $this->belongsTo(User::class); | |
| } | |
| } |
Step:10- Now, define the Relationship inside the User.php model.
| <?php | |
| namespace App; | |
| use Illuminate\Notifications\Notifiable; | |
| use Illuminate\Foundation\Auth\User as Authenticatable; | |
| class User extends Authenticatable | |
| { | |
| use Notifiable; | |
| /** | |
| * The attributes that are mass assignable. | |
| * | |
| * @var array | |
| */ | |
| protected $fillable = [ | |
| 'name', 'email', 'password', | |
| ]; | |
| /** | |
| * The attributes that should be hidden for arrays. | |
| * | |
| * @var array | |
| */ | |
| protected $hidden = [ | |
| 'password', 'remember_token', | |
| ]; | |
| public function files() | |
| { | |
| return $this->hasMany(File::class); | |
| } | |
| } |
Step:11- php artisan make:controller FileController. run this command in composer.
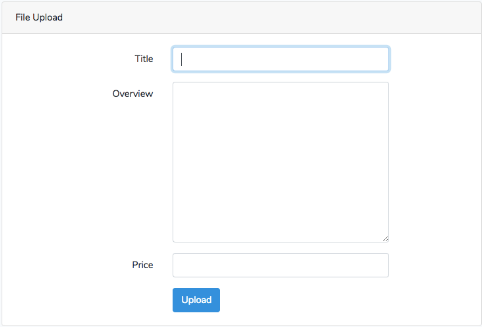
Step:12- Create a View and Route for uploading files.
| Route::post('upload', 'FileController@upload')->name('upload'); |
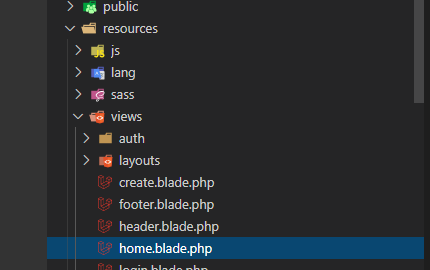
Step:13- home.blade.php create this page
| @extends('layouts.app') | |
| @section('content') | |
| <div class="container"> | |
| <div class="row justify-content-center"> | |
| <div class="col-md-8"> | |
| <div class="card"> | |
| <div class="card-header">File Upload</div> | |
| <div class="card-body"> | |
| <form method="POST" action="{{ route('file.upload') }}" aria-label="{{ __('Upload') }}"> | |
| @csrf | |
| <div class="form-group row"> | |
| <label for="title" class="col-sm-4 col-form-label text-md-right">{{ __('Title') }}</label> | |
| <div class="col-md-6"> | |
| <input id="title" type="text" class="form-control{{ $errors->has('title') ? ' is-invalid' : '' }}" name="title" value="{{ old('title') }}" required autofocus /> | |
| @if ($errors->has('title')) | |
| <span class="invalid-feedback" role="alert"> | |
| <strong>{{ $errors->first('title') }}</strong> | |
| </span> | |
| @endif | |
| </div> | |
| </div> | |
| <div class="form-group row"> | |
| <label for="overview" class="col-sm-4 col-form-label text-md-right">{{ __('Overview') }}</label> | |
| <div class="col-md-6"> | |
| <textarea id="overview" cols="10" rows="10" class="form-control{{ $errors->has('overview') ? ' is-invalid' : '' }}" name="overview" value="{{ old('overview') }}" required autofocus></textarea> | |
| @if ($errors->has('overview')) | |
| <span class="invalid-feedback" role="alert"> | |
| <strong>{{ $errors->first('overview') }}</strong> | |
| </span> | |
| @endif | |
| </div> | |
| </div> | |
| <div class="form-group row"> | |
| <label for="price" class="col-md-4 col-form-label text-md-right">{{ __('Price') }}</label> | |
| <div class="col-md-6"> | |
| <input id="price" type="text" class="form-control{{ $errors->has('price') ? ' is-invalid' : '' }}" name="price" required> | |
| @if ($errors->has('price')) | |
| <span class="invalid-feedback" role="alert"> | |
| <strong>{{ $errors->first('price') }}</strong> | |
| </span> | |
| @endif | |
| </div> | |
| </div> | |
| <div class="form-group row mb-0"> | |
| <div class="col-md-8 offset-md-4"> | |
| <button type="submit" class="btn btn-primary"> | |
| {{ __('Upload') }} | |
| </button> | |
| </div> | |
| </div> | |
| </form> | |
| </div> | |
| </div> | |
| </div> | |
| </div> | |
| </div> | |
| @endsection |
Step:14- you need to define the Post route inside routes >> web.php file.
| <?php | |
| // web.php | |
| Route::get('/', function () { | |
| return view('welcome'); | |
| }); | |
| Auth::routes(); | |
| Route::get('/home', 'HomeController@index')->name('home'); | |
| Route::post('file/upload', 'FileController@store')->name('file.upload'); |
you can see the page view.
Step:15- Storing the form data.
| <?php | |
| namespace App\Http\Controllers; | |
| use Illuminate\Http\Request; | |
| class FileController extends Controller | |
| { | |
| public function store(Request $request) | |
| { | |
| $request->validate([ | |
| 'title' => 'required:max:255', | |
| 'overview' => 'required', | |
| 'price' => 'required|numeric' | |
| ]); | |
| auth()->user()->files()->create([ | |
| 'title' => $request->get('title'), | |
| 'overview' => $request->get('overview'), | |
| 'price' => $request->get('price') | |
| ]); | |
| return back()->with('message', 'Your file is submitted Successfully'); | |
| } | |
| } |
Also, we need to update our view to see the flash message.
| @if(session()->get('message')) | |
| <div class="alert alert-success"> | |
| {{ session()->get('message') }} | |
| </div> | |
| @endif |
MotoShare.in is your go-to platform for adventure and exploration. Rent premium bikes for epic journeys or simple scooters for your daily errands—all with the MotoShare.in advantage of affordability and ease.
