If you want to learn and practice Teradata database Please find here the guidance how to Installation and Configuration Teradata Tools=and Utilities in your computer.
The latest Teradata Tools and Utilities – Windows and Linux Installation Package is version 17.10
Teradata provides Teradata express for VMWARE, which is a fully operational Teradata virtual machine. It provides up to 1 terabyte of storage. Teradata provides both 40GB and 1TB versions of VMware.
Teradata releases pre-installed image for Teradata Express for VMware Workstation/Player. By installing this, you can access Teradata from your local system using Teradata SQL Assistant, Teradata Studio or any other utilities like BTEQ, FASTLOAD, MLOAD, TPT etc. You can follow few simple steps as below:-
Prerequisite:-
- 64 bit virtualization capable PC.
- Minimum 3GB RAM. 4GB is recommended
- VMware workstation/Player. Latest VMware workstation is recommended
- Teradata 15.00.01 or any other version. Teradata Express for VMware Workstation/Player
- Teradata-TTU-17.10_Version_for_Windows. Teradata tools and utilities
Installation and Configuration Teradata Tools and Utilities for WINDOW
To install the Teradata Workstation on windows follows below steps:
1st Step:
Download Teradata Express and VMware workstation from Teradata Express for VMware Workstation/Player and Latest VMware workstation respectively.
It is available for both Windows and Linux Platform.
we will Download the VMware workstation player for Windows.

Once downloaded, you can unzip Teradata Express into some folder. Suppose you have unzipped it in a folder name “virtual”. You will end up with something like this- ” F:\virtual\TDExpressXX_Sles11_40GB “. Than Install VMware workstation.
2nd Step:
Open VMware Workstation Welcome page, choose “Open a Virtual Machine” and navigate to Teradata express folder, looking for the ” TDExpress17.10.01_Sles11″ file.

3rd Step:
Once you find the image, open it by double clicking. Vmware will now ask you if you want to copy or move this image. Make sure to choose ‘I MOVED IT‘!
4th Step:
Now click on “Power on this virtual machine”.

Download the required Teradata TTU latest version from the following link:
5th Step:
Login into the SLES11 VM with username “root” and password “root”. Wait for sometimes, it will initialize the Teradata.
6th Step:
Once it is ready, open Gnome terminal and you can check the status of Teradata database server using below command-

Now you can test the connectivity as well using bteq with username “dbc” and password “dbc”.

You have successfully completed the installation of fully functional Teradata server. If you want to access this Teradata database server from your local PC, few extra steps you may follow:-
7th Step:
Download Teradata tools and utilitie for windows. Generally .NET is always installed in computer , Please check for the same and If .NET not install in your computer than You need to install .NET framework prior to install Teradata Tools and Utilities(TTU). Link Available to download .NET
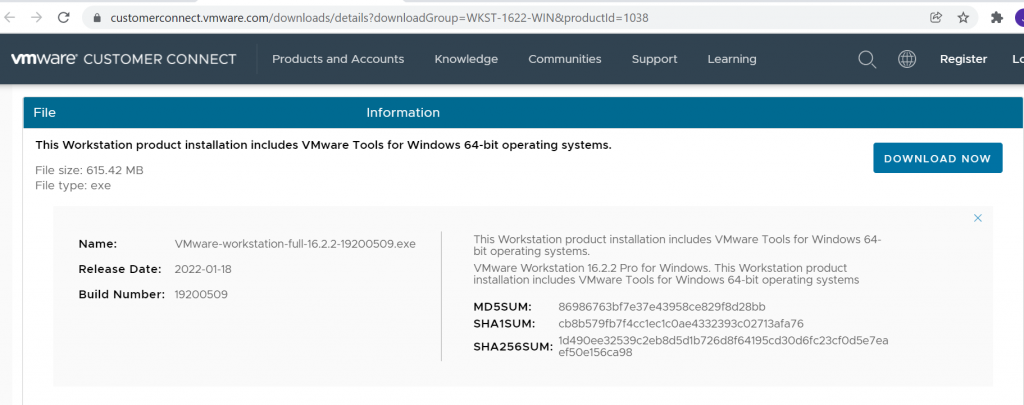
Download the required VMware version from the following link:
https://customerconnect.vmware.com/downloads/details?downloadGroup=WKST-1622-WIN&productId=1038
8th Step:
Once installation of TTU is done, set up the IP for VM and SLES11 to access it from your local system using Teradata SQL Assistant or any other utilities.
Open Virtual Network Editor from the EDIT menu of VM.

Select VMnet8 NAT setting and set up Gateway IP.
Suppose your NAT subnet Address is 192.168.181.0, you may provide Gateway IP as 192.168.181.1. Click OK.

Now open Network Settings in SLES11 i.e. from the operating system within the VMware.
Computer -> Control Center -> Network Settings -> Select Ethernet Network Card->Edit. Suppose Gateway IP is 192.168.181.1 in NAT setting, you have to enter 192.168.181.2 here as below-

Click Next.
Now open command prompt in local system and ping this IP Address.

All done. Now you can use this IP Address(192.168.181.2) from your local ODBC driver, Teradata SQL Assistant or BTEQ to access Teradata database server.

Now You can Connect Teradata SQL Assistance. (The Teradata SQL Assistance connection will be covered in next Tutorial)
Important Points:
The Teradata Administrator Tool is not available in version above than TTU 15.00. The Teradata Administrator Tool is available in TTU Vers15.00. Also Teradata Studio the new version tool is available to connect Teradata (This topic will be covered in another tutorial).
MotoShare.in is your go-to platform for adventure and exploration. Rent premium bikes for epic journeys or simple scooters for your daily errands—all with the MotoShare.in advantage of affordability and ease.

 Starting: 1st of Every Month
  +91 8409492687
  Contact@DevOpsSchool.com
