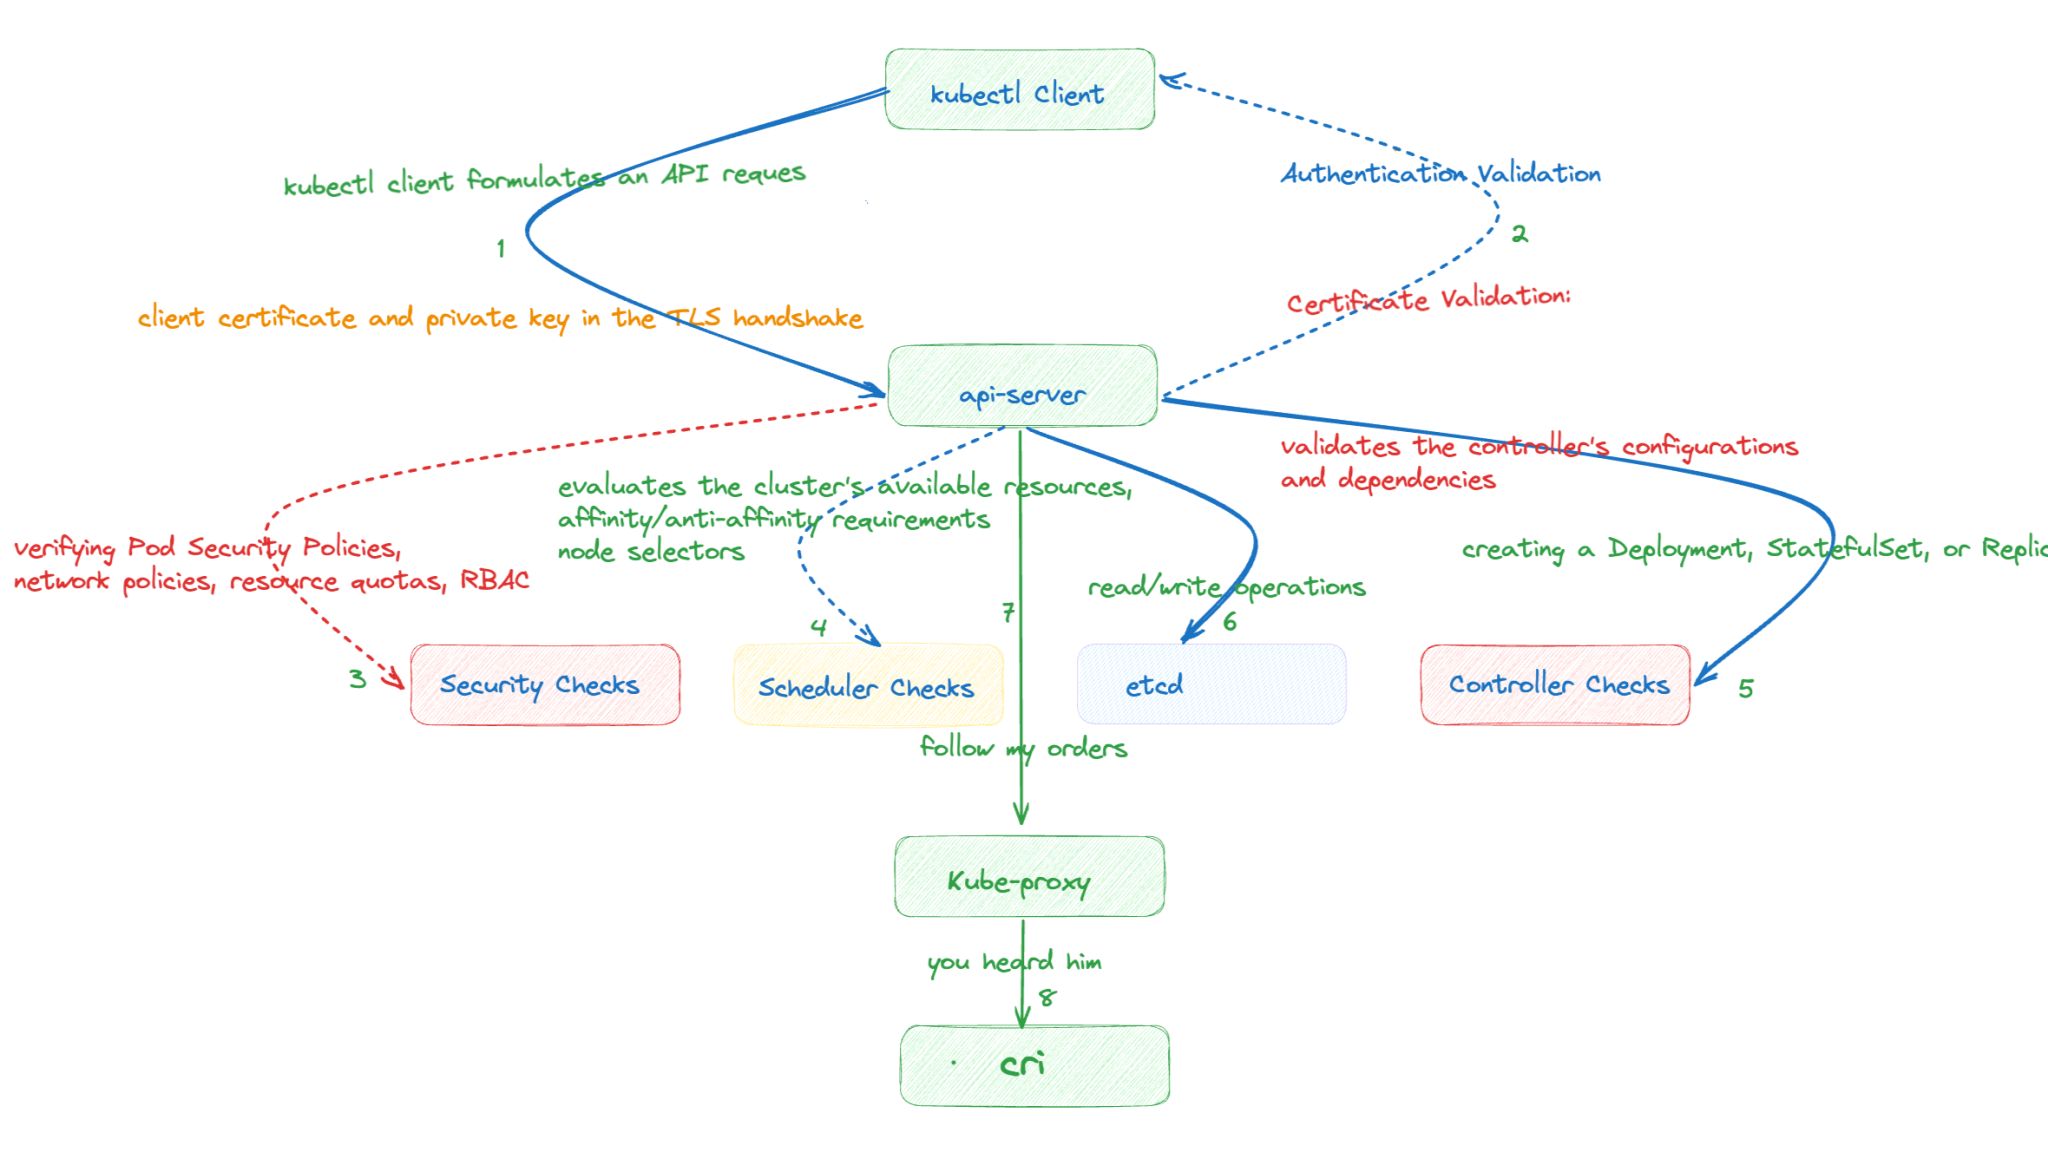
When kubectl receives a create command, it performs the following steps:
- Parses the command line arguments and identifies the type of resource to create.
- Validates the command line arguments, including the resource type, name, and any other required fields.
- Serializes the resource definition into a JSON or YAML document.
- Sends the resource definition to the Kubernetes API server.
- Waits for the API server to create the resource.
- Displays a success message to the user.
- Parsing the Configuration:
kubectlreads the YAML or JSON file provided as an argument to thecreatecommand. This file should contain a resource definition, which includes details about the desired state of the resource to be created, such as the resource type, name, labels, and any other configuration parameters. - API Server Communication:
kubectlcommunicates with the Kubernetes API server, which is responsible for managing the cluster’s state. It sends a POST request to the API server with the resource definition from the file. - Resource Validation: The API server performs validation checks on the resource definition to ensure that it is well-formed and complies with any applicable constraints or policies. If there are any issues with the resource definition, the API server will reject the request and provide an error message.
- Resource Creation: If the resource definition is valid and there are no conflicts (e.g., a resource with the same name already exists), the API server creates the requested resource in the cluster based on the provided configuration. This involves allocating resources, setting up networking, and any other necessary actions to fulfill the desired state.
- Response: The API server responds to the
kubectlclient with the status of the operation. If the resource creation is successful, it returns a success message and the resource’s details, including its unique identifier (UID). If there are errors or conflicts, it provides error messages for debugging. - Client Feedback:
kubectldisplays the API server’s response to the user, allowing them to confirm whether the resource creation was successful or if there were any issues. - Resource Controller Actions: After a resource is created, the appropriate Kubernetes controller (e.g., Deployment controller, StatefulSet controller) may take further actions to ensure that the desired state is maintained. For example, if you created a Deployment resource, the Deployment controller will start the specified number of pods.
I’m a DevOps/SRE/DevSecOps/Cloud Expert passionate about sharing knowledge and experiences. I am working at Cotocus. I blog tech insights at DevOps School, travel stories at Holiday Landmark, stock market tips at Stocks Mantra, health and fitness guidance at My Medic Plus, product reviews at I reviewed , and SEO strategies at Wizbrand.
Please find my social handles as below;
Rajesh Kumar Personal Website
Rajesh Kumar at YOUTUBE
Rajesh Kumar at INSTAGRAM
Rajesh Kumar at X
Rajesh Kumar at FACEBOOK
Rajesh Kumar at LINKEDIN
Rajesh Kumar at PINTEREST
Rajesh Kumar at QUORA
Rajesh Kumar at WIZBRAND

 Starting: 1st of Every Month
  +91 8409492687
  Contact@DevOpsSchool.com
