Download & Install Grafana 11.x using TAR
$ cd /opt/
$ wget https://dl.grafana.com/enterprise/release/grafana-enterprise-11.0.0.linux-amd64.tar.gz
$ ls
$ tar -zxvf grafana-enterprise-11.0.0.linux-amd64.tar.gz
$ cd grafana-v11.0.0/
$ cd bin/
$ cd ..
$ ls
$ cd conf/
$ ls
$ more defaults.ini [ its config file for grafana ]
$ ls
$ cd ..
$ cd bin/
$ ls
$ nohup ./grafana-server &
$ tail -f nohup.outCode language: JavaScript (javascript)
Download & Install Grafana 8.x using TAR and RPM
Standalone Linux Binaries(64 Bit)SHA256:
$ cd /opt/
$ wget https://dl.grafana.com/oss/release/grafana-8.1.5.linux-amd64.tar.gz
$ tar -zxvf grafana-8.1.5.linux-amd64.tar.gz
$ cd grafana-8.1.5
$ cd bin
$ nohup ./grafana-server &
$ ps -eaf | grep gra

Red Hat, CentOS, RHEL, and Fedora(64 Bit)SHA256:
$ wget https://dl.grafana.com/oss/release/grafana-8.0.5-1.x86_64.rpm
$ sudo yum install grafana-8.0.5-1.x86_64.rpmCode language: JavaScript (javascript)
Ubuntu and Debian
sudo apt-get install -y adduser libfontconfig1
wget https://dl.grafana.com/oss/release/grafana_8.1.5_amd64.deb
sudo dpkg -i grafana_8.1.5_amd64.debCode language: JavaScript (javascript)
Standalone Linux Binaries(64 Bit)
wget https://dl.grafana.com/oss/release/grafana-8.1.5.linux-amd64.tar.gz
tar -zxvf grafana-8.1.5.linux-amd64.tar.gzCode language: JavaScript (javascript)
Red Hat, CentOS, RHEL, and Fedora(64 Bit)
wget https://dl.grafana.com/oss/release/grafana-8.1.5-1.x86_64.rpm
sudo yum install grafana-8.1.5-1.x86_64.rpmCode language: JavaScript (javascript)
OpenSUSE and SUSE
wget https://dl.grafana.com/oss/release/grafana-8.1.5-1.x86_64.rpm
sudo rpm -i --nodeps grafana-8.1.5-1.x86_64.rpmCode language: JavaScript (javascript)
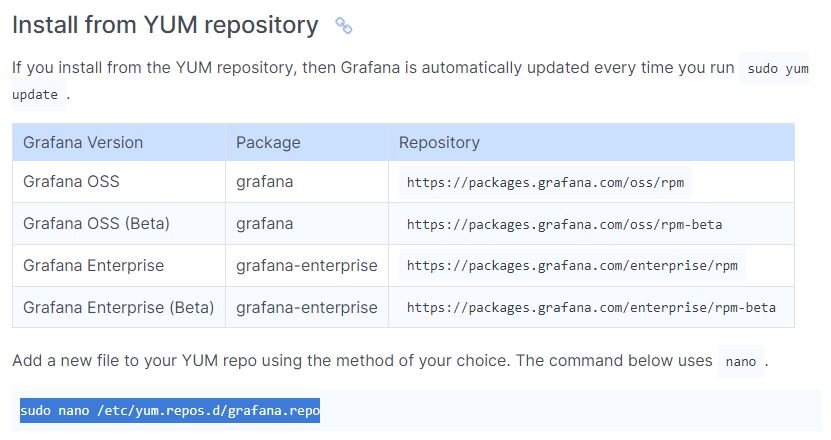
Download & Install Grafana using YUM Repo (Optional)

Grafana Version	Package	Repository
Grafana OSS			grafana	https://packages.grafana.com/oss/rpm
Grafana OSS (Beta)		grafana	https://packages.grafana.com/oss/rpm-beta
Grafana Enterprise		grafana-enterprise	https://packages.grafana.com/enterprise/rpm
Grafana Enterprise (Beta)	grafana-enterprise	https://packages.grafana.com/enterprise/rpm-beta

Add a new file to your YUM repo using the method of your choice. The command below uses nano.

sudo nano /etc/yum.repos.d/grafana.repo

For Enterprise releases:

[grafana]
name=grafana
baseurl=https://packages.grafana.com/enterprise/rpm
repo_gpgcheck=1
enabled=1
gpgcheck=1
gpgkey=https://packages.grafana.com/gpg.key
sslverify=1
sslcacert=/etc/pki/tls/certs/ca-bundle.crt

For OSS releases:

[grafana]
name=grafana
baseurl=https://packages.grafana.com/oss/rpm
repo_gpgcheck=1
enabled=1
gpgcheck=1
gpgkey=https://packages.grafana.com/gpg.key
sslverify=1
sslcacert=/etc/pki/tls/certs/ca-bundle.crt


Install Grafana with one of the following commands:

$ sudo yum install grafana

# or

$ sudo yum install grafana-enterpriseCode language: PHP (php)
Step 2 – Understand Grafana Installation details in RHEL/CENTOS
Installs binary to /usr/sbin/grafana-server
Copies init.d script to /etc/init.d/grafana-server
Installs binary to /usr/sbin/grafana-server
Copies init.d script to /etc/init.d/grafana-server
Installs default file (environment vars) to /etc/sysconfig/grafana-server
Copies configuration file to /etc/grafana/grafana.ini
Installs systemd service (if systemd is available) name grafana-server.service
The default configuration uses a log file at /var/log/grafana/grafana.log
The default configuration specifies an sqlite3 database at /var/lib/grafana/grafana.dbCode language: JavaScript (javascript)
Step 3 – Start the server (init.d service)
# Start the server with systemd - To start the service and verify that the service has started:

$ sudo systemctl daemon-reload
$ sudo systemctl start grafana-server
$ sudo systemctl status grafana-server

# Configure the Grafana server to start at boot:
$ sudo systemctl enable grafana-server

# Start the server with init.d - To start the service and verify that the service has started:

$ sudo service grafana-server start
$ sudo service grafana-server status

# Configure the Grafana server to start at boot:
$ sudo /sbin/chkconfig --add grafana-serverCode language: PHP (php)
This will start the grafana-server process as the grafana user, which is created during package installation. The default HTTP port is 3000, and default user and group is admin.
Step 4 – Configure the Grafana server to start at boot time
$ sudo /sbin/chkconfig --add grafana-server
$ sudo systemctl enable grafana-server.service
$ systemctl daemon-reload
$ systemctl start grafana-server
$ systemctl status grafana-server
Step 5 – Grafana server Environment file
The systemd service file and init.d script both use the file located at /etc/sysconfig/grafana-server for environment variables used when starting the back-end. Here you can override log directory, data directory and other variables.
Step 6 – Grafana server Log
By default Grafana will log to /var/log/grafana
Step 7 – Grafana Database
The default configuration specifies a sqlite3 database located at /var/lib/grafana/grafana.db. Please backup this database before upgrades.
You can also use MySQL or Postgres as the Grafana database, as detailed on
http://docs.grafana.org/installation/configuration/#database
Step 8 – Grafana configuration
The configuration file is located at /etc/grafana/grafana.ini. Go the Configuration page for details on all those options. You can add following data sources
- Graphite
- InfluxDB
- OpenTSDB
- Prometheus
Step 9 – Server side image rendering
Server side image (png) rendering is a feature that is optional but very useful when sharing visualizations, for example in alert notifications.

$ sudo yum install fontconfig -y
$ sudo yum install freetype* -y
$ sudo yum install urw-fonts -y
Step 10 – Browse the dashboard
http://X.X.X.X.:3000/
Username - admin
Password - adminCode language: JavaScript (javascript)I’m a DevOps/SRE/DevSecOps/Cloud Expert passionate about sharing knowledge and experiences. I am working at Cotocus. I blog tech insights at DevOps School, travel stories at Holiday Landmark, stock market tips at Stocks Mantra, health and fitness guidance at My Medic Plus, product reviews at I reviewed , and SEO strategies at Wizbrand.
Do you want to learn Quantum Computing?
Please find my social handles as below;
Rajesh Kumar Personal Website
Rajesh Kumar at YOUTUBE
Rajesh Kumar at INSTAGRAM
Rajesh Kumar at X
Rajesh Kumar at FACEBOOK
Rajesh Kumar at LINKEDIN
Rajesh Kumar at PINTEREST
Rajesh Kumar at QUORA
Rajesh Kumar at WIZBRAND

