Laravel passport
Laravel Passport is an OAuth2 server and API authentication package that is simple and enjoyable to use. We will use laravel passport to authenticate token-based request except for session
You have to just follow a few steps to get following web services:
- Login API
- Register API
- Details API
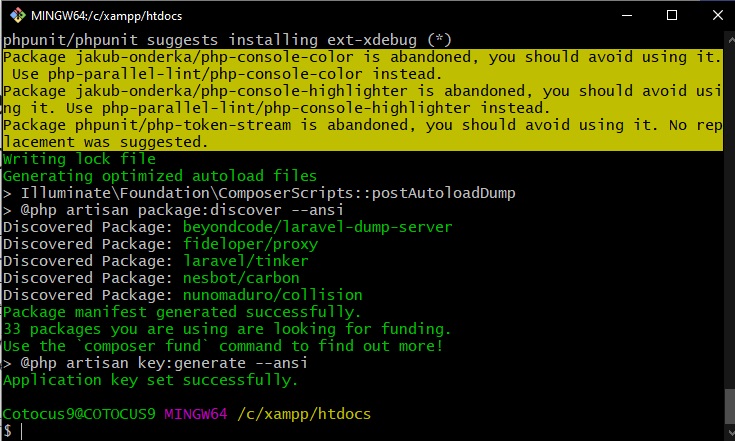
Step 1 – First Create a Project
$ composer create-project --prefer-dist laravel/laravel RestAPI "5.8.*"
Code language: JavaScript (javascript)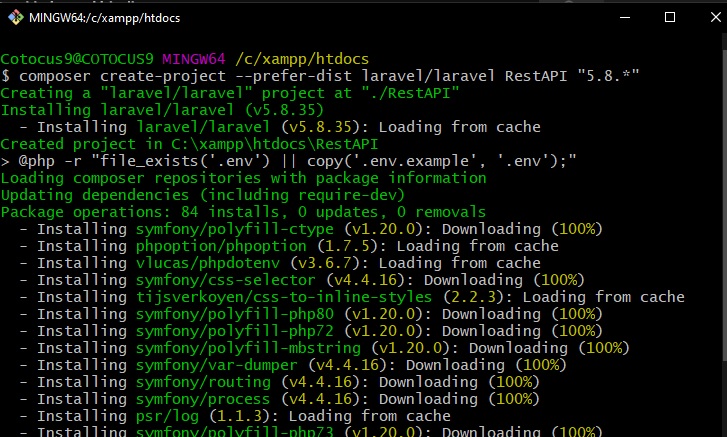
Step 2 – Install Package
There are two ways to install package:
- Write the following command given below
composer require laravel/passportCode language: JavaScript (javascript)2. Update the composer and check your composer.json file
composer update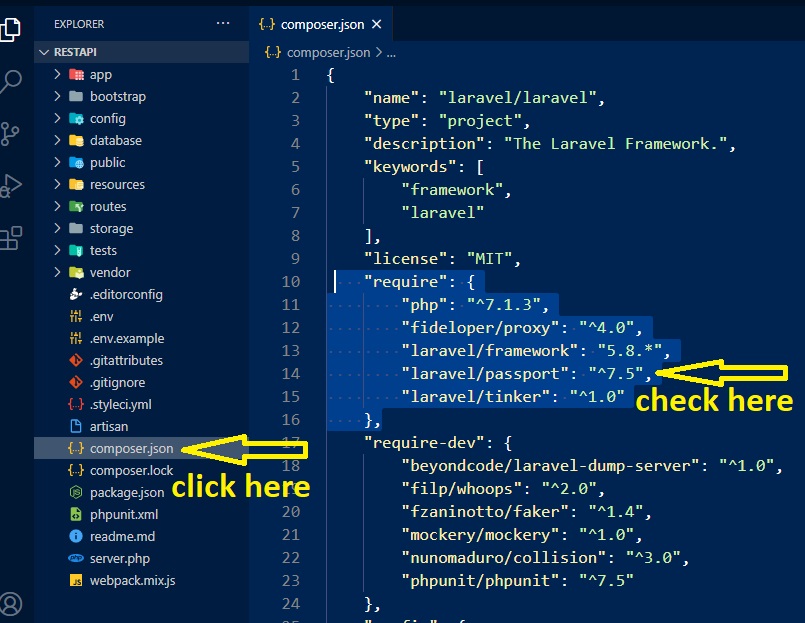
Step 3 – Open config/app.php file and add service provider
| config/app.php | |
| 'providers' =>[ | |
| Laravel\Passport\PassportServiceProvider::class, | |
| ], |

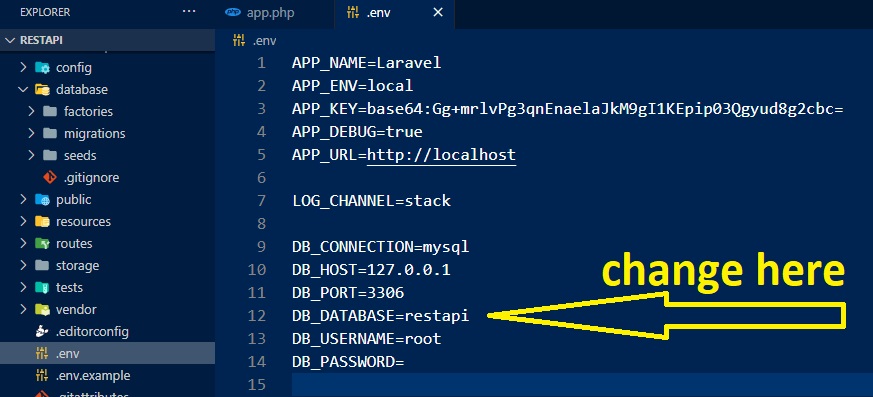
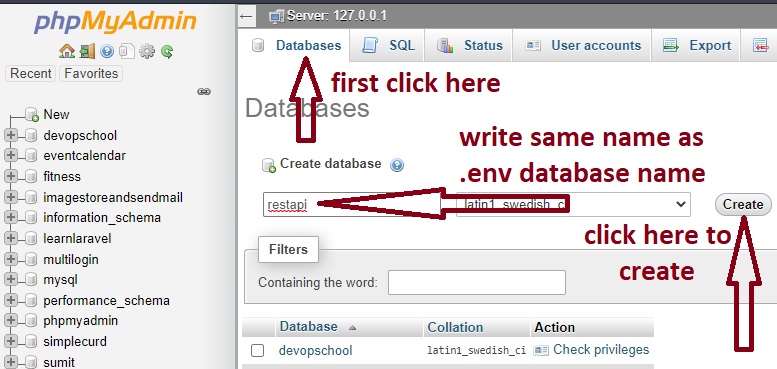
Step 4 – Update database name (.env file)
Step 5 – Open phpMyAdmin and create databse
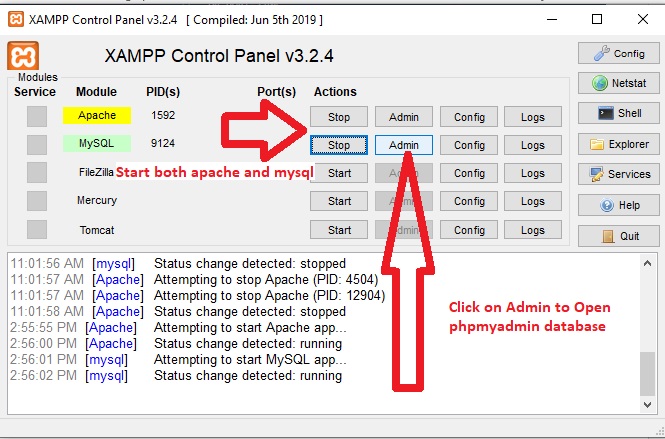
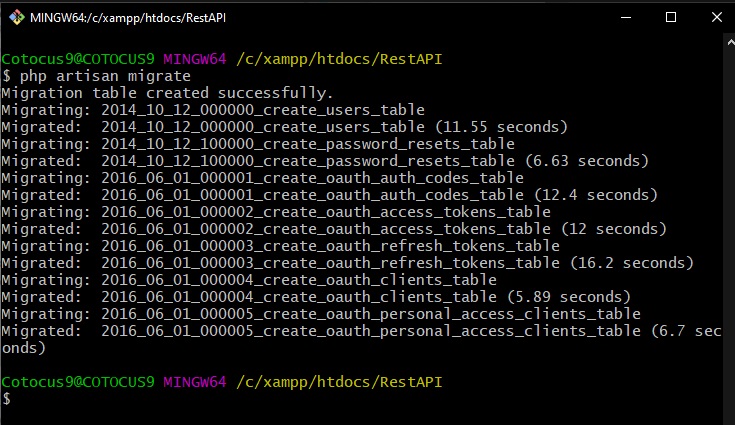
Step 5 – Run Migration and Install
php artisan migrate
php artisan passport:installCode language: CSS (css)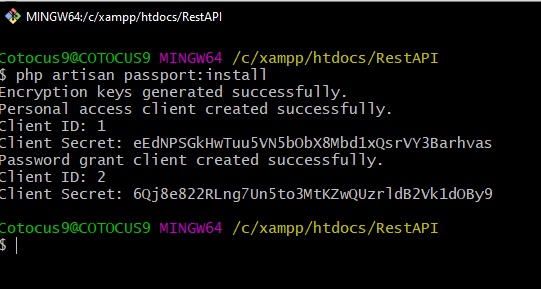
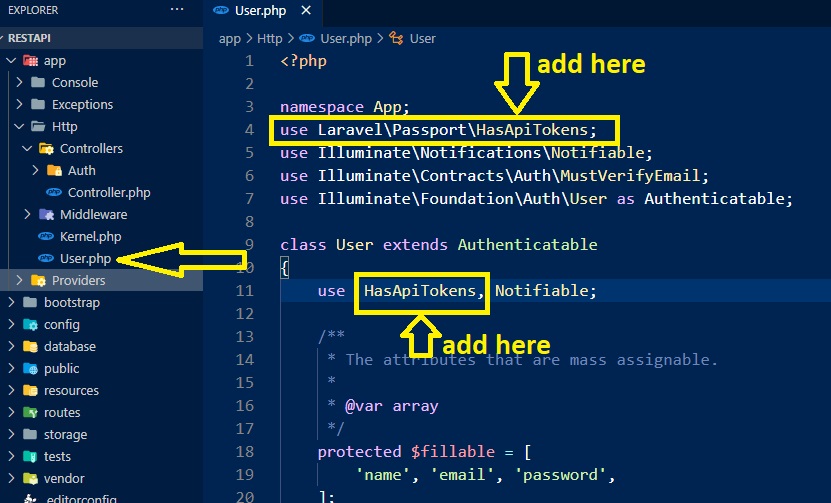
Step – 6 Modify User.php
Go to app–>http–>User.php
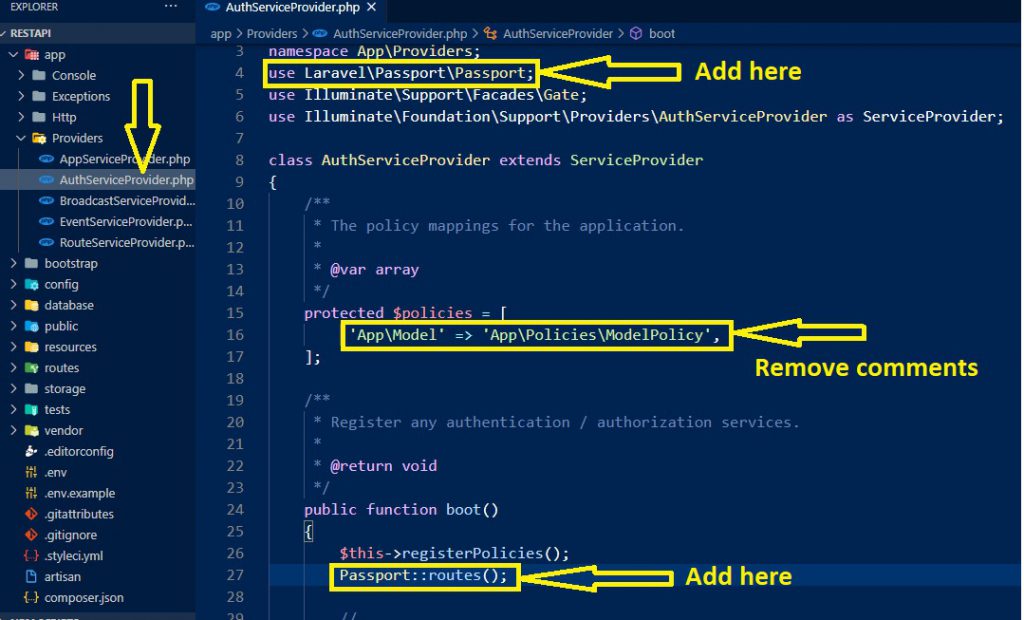
Step – 7 Modify app/Providers/AuthServiceProvider.php
Step 8 – Modify config/auth.php
| <?php | |
| return [ | |
| 'guards' => [ | |
| 'web' => [ | |
| 'driver' => 'session', | |
| 'provider' => 'users', | |
| ], | |
| 'api' => [ | |
| 'driver' => 'passport', | |
| 'provider' => 'users', | |
| ], | |
| ], |
Step -9 Create API Route
Go to routes–>api.php
| Route::post('login', 'API\UserController@login'); | |
| Route::post('register', 'API\UserController@register'); | |
| Route::get('user', 'API\UserController@getAllUsers'); | |
| Route::group(['middleware' => 'auth:api'], function() | |
| { | |
| Route::get('details', 'API\UserController@details'); | |
| }); | |
| Route::put('update/{id}','API\UserController@update'); | |
| Route::delete('delete/{id}','API\UserController@delete'); |
Step 10 – Create The Controller
 php artisan make:controller UserController
Code language: CSS (css)
Step 11 – Open UserController
- We create an API folder inside the Controllers folder
- After Creating, we Move UserController.php to API folder
| <?php | |
| namespace App\Http\Controllers; | |
| namespace App\Http\Controllers\API; | |
| use Illuminate\Http\Request; | |
| use App\Http\Controllers\Controller; | |
| use App\User; | |
| use Illuminate\Support\Facades\Auth; | |
| use Validator; | |
| class UserController extends Controller | |
| { | |
| public $successStatus = 200; | |
| /** | |
| * login api | |
| * | |
| * @return \Illuminate\Http\Response | |
| */ | |
| public function login(){ | |
| if(Auth::attempt(['email' => request('email'), 'password' => request('password')])){ | |
| $user = Auth::user(); | |
| $success['token'] = $user->createToken('MyApp')-> accessToken; | |
| return response()->json(['success' => $success], $this-> successStatus); | |
| } | |
| else{ | |
| return response()->json(['error'=>'Unauthorised'], 401); | |
| } | |
| } | |
| // Register api, We are registering the user details | |
| public function register(Request $request) | |
| { | |
| $validator = Validator::make($request->all(), [ | |
| 'name' => 'required', | |
| 'email' => 'required|email', | |
| 'password' => 'required', | |
| 'c_password' => 'required|same:password', | |
| ]); | |
| if ($validator->fails()) { | |
| return response()->json(['error'=>$validator->errors()], 401); | |
| } | |
| $input = $request->all(); | |
| $input['password'] = bcrypt($input['password']); | |
| $user = User::create($input); | |
| $success['token'] = $user->createToken('MyApp')-> accessToken; | |
| $success['name'] = $user->name; | |
| return response()->json(['success'=>$success], $this-> successStatus); | |
| } | |
| // we are creating the update funtion, to update the user details | |
| public function update(Request $request) | |
| { | |
| $res=User::find($request->id); | |
| $res->name=$request->name; | |
| $res->email=$request->email; | |
| $res->password= bcrypt($request['password']); | |
| $result=$res->save(); | |
| if($result) | |
| { | |
| return ["result"=>"data is updated"]; | |
| } | |
| else | |
| { | |
| return ["result"=>"Operation Failed , data is not updated"]; | |
| } | |
| } | |
| //Get all the details of the users | |
| public function getAllUsers() | |
| { | |
| $user = User::get()->toJson(JSON_PRETTY_PRINT); | |
| return response($user, 200); | |
| } | |
| // Get the currently authenticated user... | |
| public function details() | |
| { | |
| $user = Auth::user(); | |
| return response()->json(['success' => $user], $this-> successStatus); | |
| } | |
| // Delete the records from the database table | |
| public function delete($id) { | |
| if(User::where('id', $id)->exists()) { | |
| $user = User::find($id); | |
| $user->delete(); | |
| return response()->json([ | |
| "message" => "records deleted" | |
| ], 202); | |
| } | |
| else | |
| { | |
| return response()->json([ | |
| "message" => "user not found" | |
| ], 404); | |
| } | |
| } | |
| } |
Go and Run the server inside RestAPI folder, code is given below-
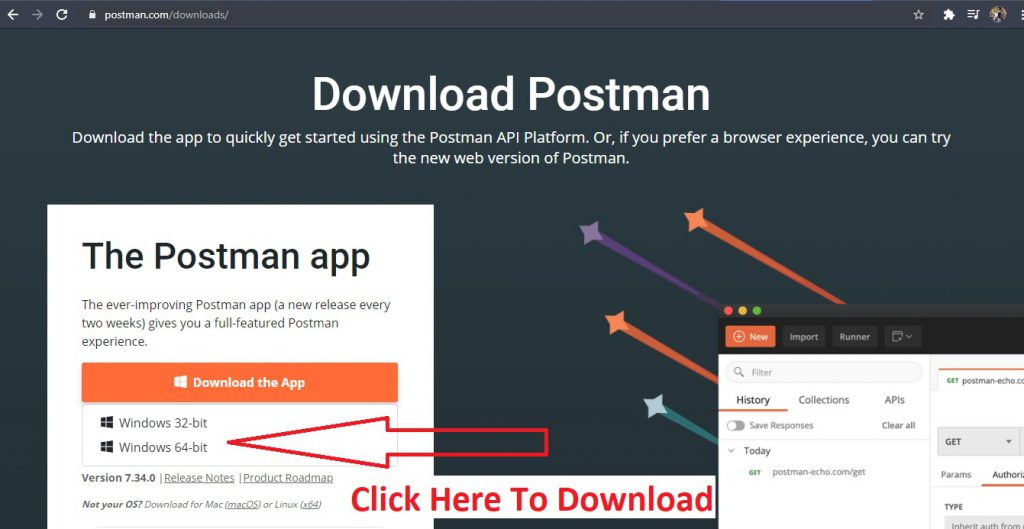
$php artisan serveCode language: PHP (php)Step – 12 Download the app to quickly get started using the Postman API Platform.
Step – 13 After Installing, Open and Hit the API
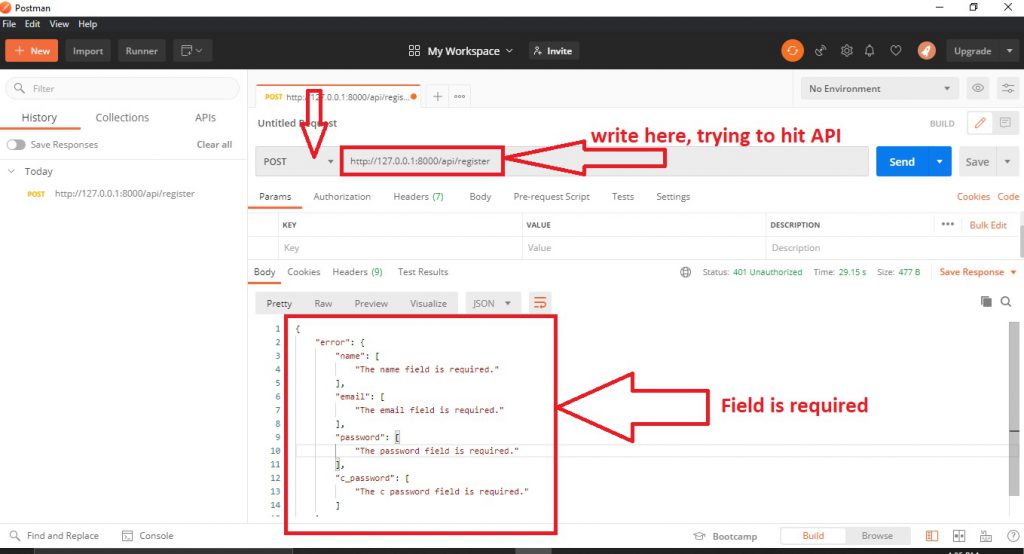
We have to write key-value pair to store data in database. Given Below
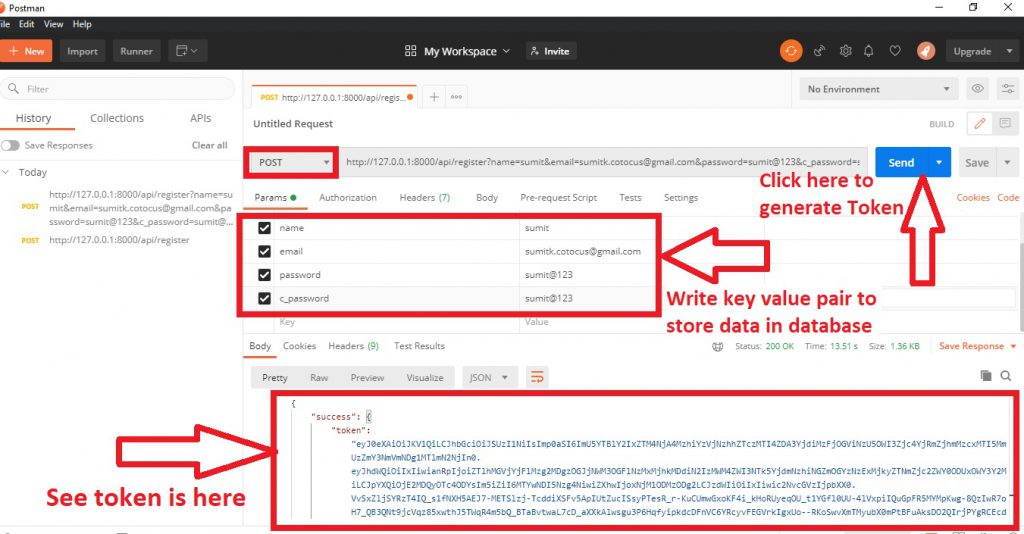
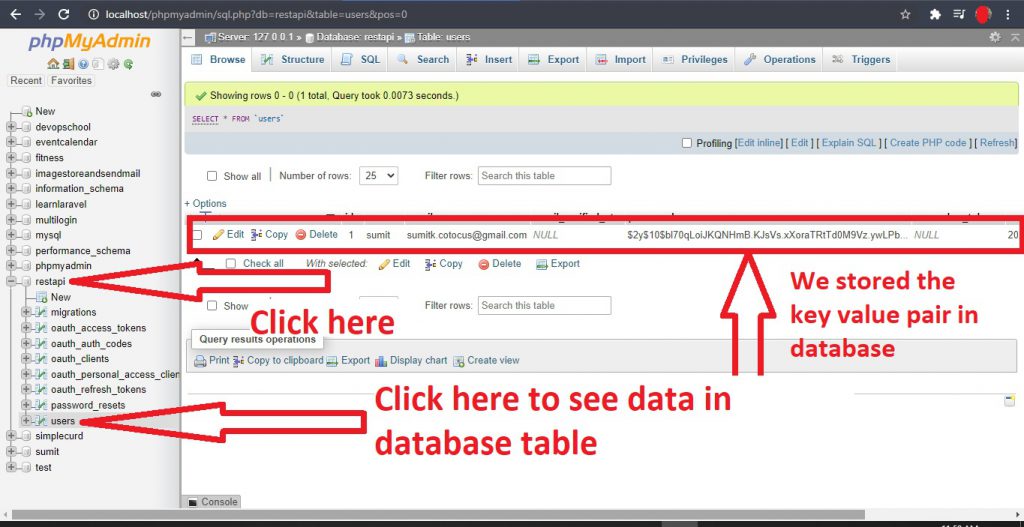
Now, Token is generated in the above image by hitting the send button. After hitting the send button the key-value pair is stored in the database. Let’s go and open phpMyAdmin given below.
I’m a DevOps/SRE/DevSecOps/Cloud Expert passionate about sharing knowledge and experiences. I am working at Cotocus. I blog tech insights at DevOps School, travel stories at Holiday Landmark, stock market tips at Stocks Mantra, health and fitness guidance at My Medic Plus, product reviews at I reviewed , and SEO strategies at Wizbrand.
Do you want to learn Quantum Computing?
Please find my social handles as below;
Rajesh Kumar Personal Website
Rajesh Kumar at YOUTUBE
Rajesh Kumar at INSTAGRAM
Rajesh Kumar at X
Rajesh Kumar at FACEBOOK
Rajesh Kumar at LINKEDIN
Rajesh Kumar at PINTEREST
Rajesh Kumar at QUORA
Rajesh Kumar at WIZBRAND
