How to display a table in a Verticle or Horizontal form in the Laravel PHP Framework?
How to Store Seed file into Database. Click
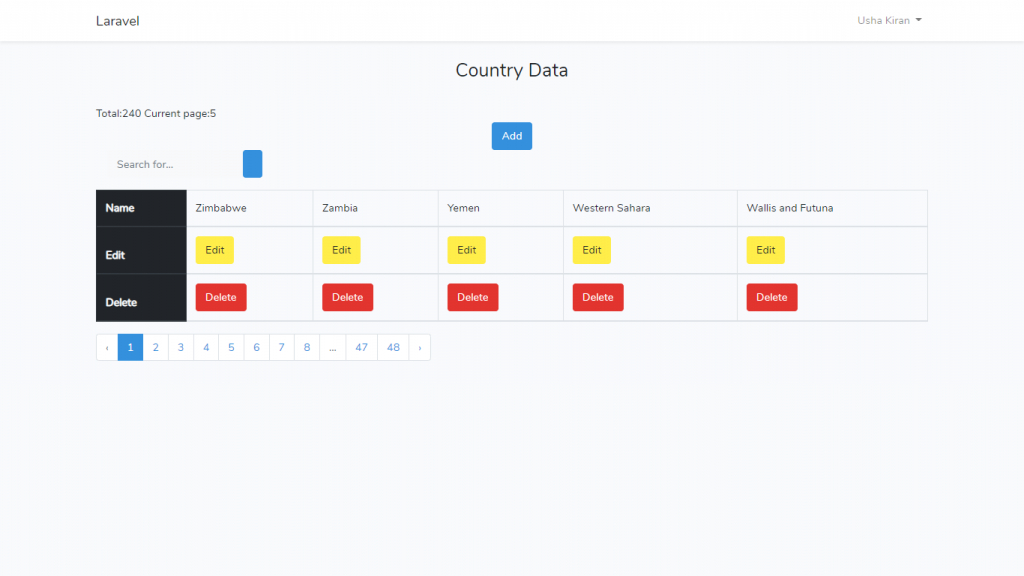
There are two headings that are shown on the vertical side, it’s displayed in the column format. It is one of the basic examples of vertical data display.
Step 1. Create a new Project in Laravel, so open git bash. Write down the following command:-
composer create-project --prefer-dist laravel/laravel Tableform "5.8.*"Code language: JavaScript (javascript)Step 2. Create the authentication scaffolding and Country model. Write down the following command:-
$ php artisan make:auth$ php artisan make:model Country -mStep 3. Generate a migration file into the database/migrations folder of the Country table.
 public function up()
    {
        Schema::create('countries', function (Blueprint $table) {
            $table->bigIncrements('country_id');
            $table->string('country_name');
            $table->timestamps();
        });
    }Code language: PHP (php)
Step 4. Migrate this table into the MySQL database, so write the following command:-
$ php artisan migrateStep 5. Create child file resources/views/Country folder with name create.blade.php.
| @extends('layouts.app') | |
| @section('content') | |
| <div class="container"> | |
| <div class="row justify-content-center"> | |
| <div class="col-md-12"> | |
| <br /> | |
| <h3 aling="center">Add Data</h3> | |
| <br /> | |
| @if(count($errors) > 0) | |
| <div class="alert alert-danger"> | |
| <ul> | |
| @foreach($errors->all() as $error) | |
| <li>{{$error}}</li> | |
| @endforeach | |
| </ul> | |
| </div> | |
| @endif | |
| @if(\Session::has('success')) | |
| <div class="alert alert-success"> | |
| <p>{{ \Session::get('success') }}</p> | |
| </div> | |
| @endif | |
| <form method="post" action="{{url('country')}}"> | |
| {{csrf_field()}} | |
| <div class="form-group"> | |
| <input type="text" name="country_name" class="form-control" placeholder="Enter country Name" /> | |
| </div> | |
| <div class="form-group"> | |
| <input type="submit" class="btn btn-primary" /> | |
| <a href="{{route('country.index')}}" class="btn btn-primary" role="button">Back</a> | |
| </div> | |
| </form> | |
| </div> | |
| </div> | |
| </div> | |
| @endsection |
Step 6. Create edit.blade.php file. In this file within resources/views/Country folder.
| @extends('layouts.app') | |
| @section('content') | |
| <div class="container"> | |
| <div class="row"> | |
| <div class="col-md-12"> | |
| <br /> | |
| <h3>Edit Record</h3> | |
| <br /> | |
| @if(session()->has('message')) | |
| <div class="alert alert-success" role="alert"> | |
| <strong>Success: </strong>{{session()->get('message')}} | |
| </div> | |
| @elseif(session()->has('error')) | |
| <div class="alert alert-danger" role="alert"> | |
| <strong>Error: </strong>{{session()->get('error')}} | |
| </div> | |
| @endif | |
| <form method="post" action="{{action('CountryController@update', $country->country_id)}}"> | |
| {{csrf_field()}} | |
| <input type="hidden" name="_method" value="PATCH" /> | |
| <div class="form-group"> | |
| <input type="text" name="country_name" class="form-control" value="{{$country->country_name}}" placeholder="Enter Country Name" /> | |
| </div> | |
| <div class="form-group"> | |
| <input type="submit" class="btn btn-primary" value="Edit" /> | |
| <a href="{{route('country.index')}}"class="btn btn-danger">Cancel</a> | |
| </div> | |
| </form> | |
| </div> | |
| </div> | |
| </div> | |
| @endsection |
Step 7. Go to app/Service.php. Now, we need to list all the properties we need in the $fillable array.
| class Country extends Model | |
| { | |
| protected $fillable = ['country_name']; | |
| } |
Next
Thanks
With MotoShare.in, you can book a bike instantly, enjoy doorstep delivery, and ride without worries. Perfect for travelers, professionals, and adventure enthusiasts looking for a seamless mobility solution.
