Install and Configure Elasticsearch in Linux
Download and Extract Elasticsearch
https://www.elastic.co/downloads/elasticsearch
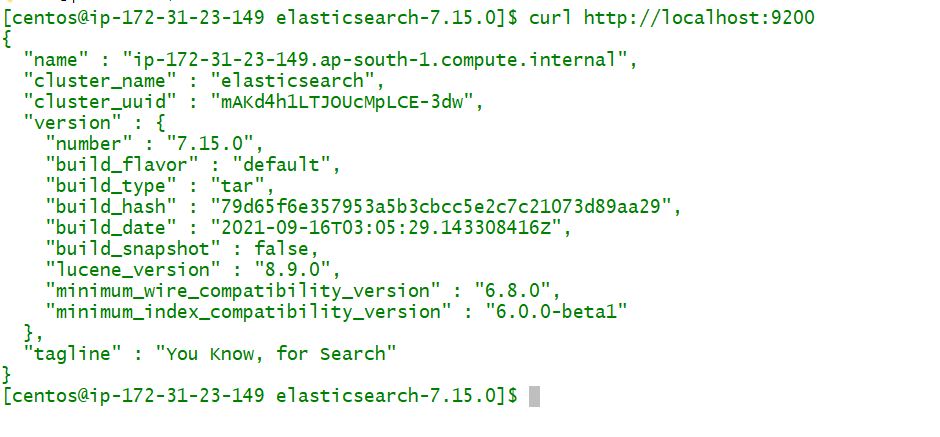
Run and Verify Elasticsearch 7.x
$ sudo yum install wget -y
$ wget https://artifacts.elastic.co/downloads/elasticsearch/elasticsearch-7.15.0-linux-x86_64.tar.gz
$ tar -zxvf elasticsearch-7.15.0-linux-x86_64.tar.gz
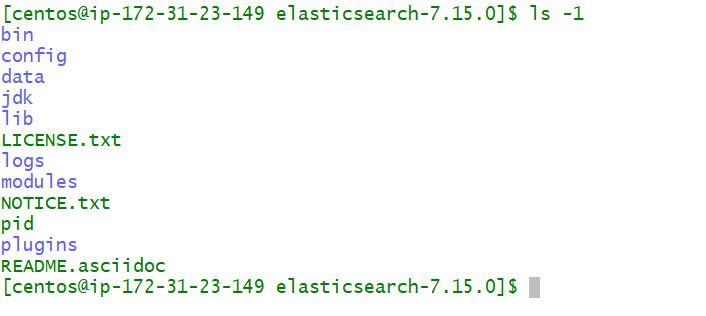
$ cd elasticsearch-7.15.0
$ ./bin/elasticsearch -d -p pid
$ ps -eaf | grep elasRun and Verify Elasticsearch 8.x
Terminal#1
$ wget https://artifacts.elastic.co/downloads/elasticsearch/elasticsearch-8.9.1-linux-x86_64.tar.gz
$ tar -zxvf elasticsearch-8.9.1-linux-x86_64.tar.gz
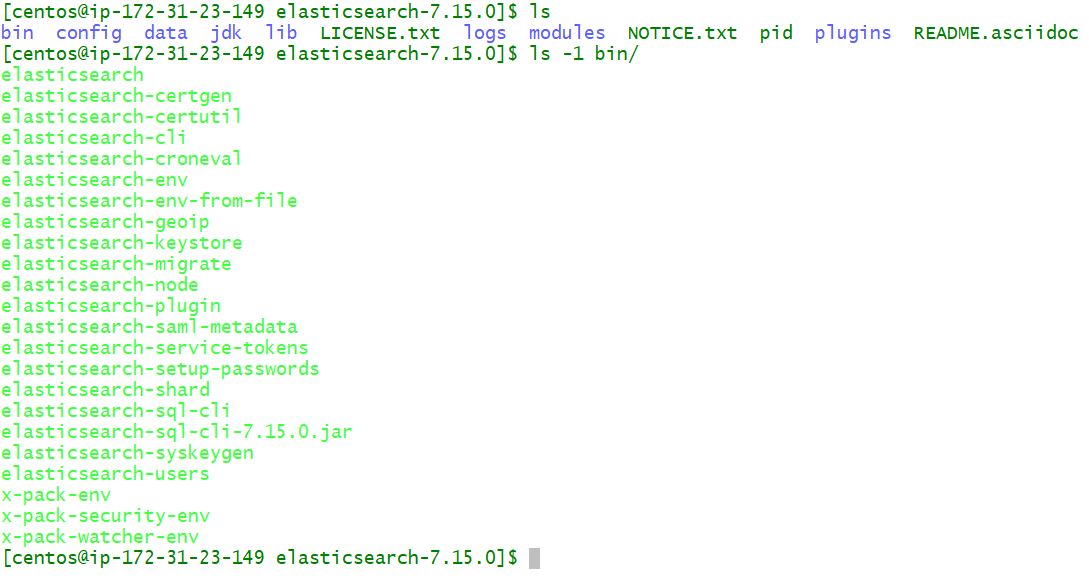
$ cd elasticsearch-8.9.1
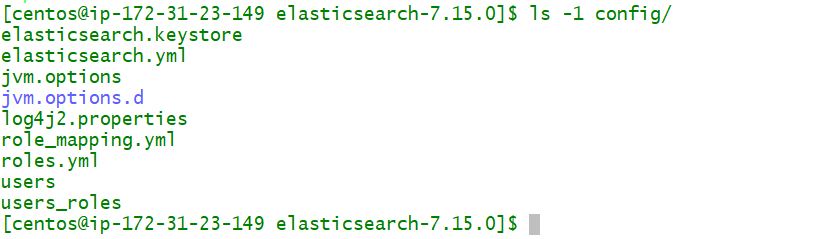
$ ls config/
$ cd bin
$ ./elasticsearch
Terminal#2
$ curl --cacert /home/ubuntu/elasticsearch-8.9.1/config/certs/http_ca.crt -u elastic https://localhost:9200
Enter host password for user 'elastic':
{
"name" : "ip-172-31-58-60",
"cluster_name" : "elasticsearch",
"cluster_uuid" : "dvbfb_NLS6qy1iuhc4yvKA",
"version" : {
"number" : "8.9.1",
"build_flavor" : "default",
"build_type" : "tar",
"build_hash" : "a813d015ef1826148d9d389bd1c0d781c6e349f0",
"build_date" : "2023-08-10T05:02:32.517455352Z",
"build_snapshot" : false,
"lucene_version" : "9.7.0",
"minimum_wire_compatibility_version" : "7.17.0",
"minimum_index_compatibility_version" : "7.0.0"
},
"tagline" : "You Know, for Search"
}Run and Verify Elasticsearch 9.x
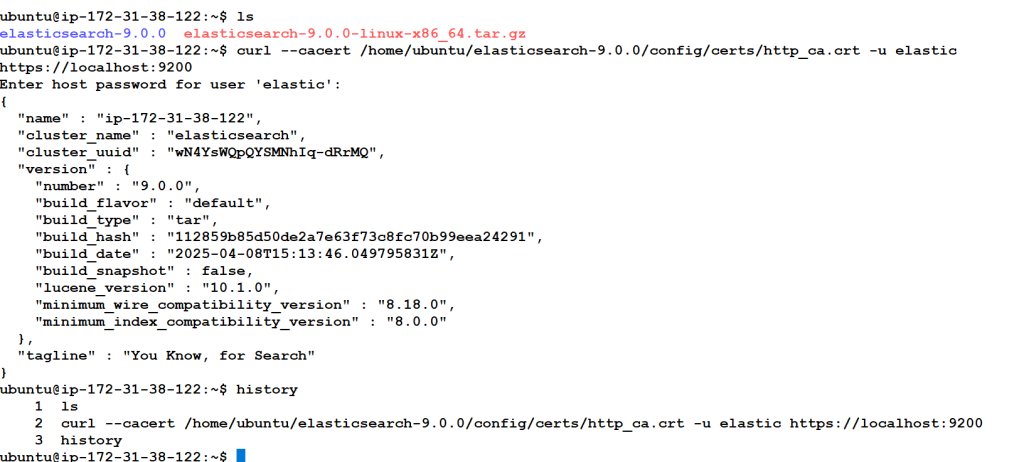
$ wget https://artifacts.elastic.co/downloads/elasticsearch/elasticsearch-9.0.0-linux-x86_64.tar.gz
$ tar -zxvf elasticsearch-9.0.0-linux-x86_64.tar.gz
$ cd ubuntu/elasticsearch-9.0.0
$ bin/elasticsearch
ubuntu@ip-172-31-38-122:~$ curl –cacert /home/ubuntu/elasticsearch-9.0.0/config/certs/http_ca.crt -u elastic https://localhost:9200
Enter host password for user ‘elastic’:
{
“name” : “ip-172-31-38-122”,
“cluster_name” : “elasticsearch”,
“cluster_uuid” : “wN4YsWQpQYSMNhIq-dRrMQ”,
“version” : {
“number” : “9.0.0”,
“build_flavor” : “default”,
“build_type” : “tar”,
“build_hash” : “112859b85d50de2a7e63f73c8fc70b99eea24291”,
“build_date” : “2025-04-08T15:13:46.049795831Z”,
“build_snapshot” : false,
“lucene_version” : “10.1.0”,
“minimum_wire_compatibility_version” : “8.18.0”,
“minimum_index_compatibility_version” : “8.0.0”
},
“tagline” : “You Know, for Search”
}
Images for Elasticsearch Install Validation

Install Elasticsearch with Docker
Pulling the image
Obtaining Elasticsearch for Docker is as simple as issuing a docker pull command against the Elastic Docker registry.
$ docker pull docker.elastic.co/elasticsearch/elasticsearch:7.15.0

Starting a single node cluster with Docker
To start a single-node Elasticsearch cluster for development or testing, specify single-node discovery to bypass the bootstrap checks:
$ docker run -p 9200:9200 -p 9300:9300 -e "discovery.type=single-node" docker.elastic.co/elasticsearch/elasticsearch:7.15.0
Elasticsearch Configuration file
| # ======================== Elasticsearch Configuration ========================= | |
| # | |
| # NOTE: Elasticsearch comes with reasonable defaults for most settings. | |
| # Before you set out to tweak and tune the configuration, make sure you | |
| # understand what are you trying to accomplish and the consequences. | |
| # | |
| # The primary way of configuring a node is via this file. This template lists | |
| # the most important settings you may want to configure for a production cluster. | |
| # | |
| # Please consult the documentation for further information on configuration options: | |
| # https://www.elastic.co/guide/en/elasticsearch/reference/index.html | |
| # | |
| # ---------------------------------- Cluster ----------------------------------- | |
| # | |
| # Use a descriptive name for your cluster: | |
| # | |
| #cluster.name: my-application | |
| # | |
| # ------------------------------------ Node ------------------------------------ | |
| # | |
| # Use a descriptive name for the node: | |
| # | |
| #node.name: node-1 | |
| # | |
| # Add custom attributes to the node: | |
| # | |
| #node.attr.rack: r1 | |
| # | |
| # ----------------------------------- Paths ------------------------------------ | |
| # | |
| # Path to directory where to store the data (separate multiple locations by comma): | |
| # | |
| #path.data: /path/to/data | |
| # | |
| # Path to log files: | |
| # | |
| #path.logs: /path/to/logs | |
| # | |
| # ----------------------------------- Memory ----------------------------------- | |
| # | |
| # Lock the memory on startup: | |
| # | |
| #bootstrap.memory_lock: true | |
| # | |
| # Make sure that the heap size is set to about half the memory available | |
| # on the system and that the owner of the process is allowed to use this | |
| # limit. | |
| # | |
| # Elasticsearch performs poorly when the system is swapping the memory. | |
| # | |
| # ---------------------------------- Network ----------------------------------- | |
| # | |
| # By default Elasticsearch is only accessible on localhost. Set a different | |
| # address here to expose this node on the network: | |
| # | |
| #network.host: 192.168.0.1 | |
| # | |
| # By default Elasticsearch listens for HTTP traffic on the first free port it | |
| # finds starting at 9200. Set a specific HTTP port here: | |
| # | |
| #http.port: 9200 | |
| # | |
| # For more information, consult the network module documentation. | |
| # | |
| # --------------------------------- Discovery ---------------------------------- | |
| # | |
| # Pass an initial list of hosts to perform discovery when this node is started: | |
| # The default list of hosts is ["127.0.0.1", "[::1]"] | |
| # | |
| #discovery.seed_hosts: ["host1", "host2"] | |
| # | |
| # Bootstrap the cluster using an initial set of master-eligible nodes: | |
| # | |
| #cluster.initial_master_nodes: ["node-1", "node-2"] | |
| # | |
| # For more information, consult the discovery and cluster formation module documentation. | |
| # | |
| # ---------------------------------- Various ----------------------------------- | |
| # | |
| # Require explicit names when deleting indices: | |
| # | |
| #action.destructive_requires_name: true |
I’m a DevOps/SRE/DevSecOps/Cloud Expert passionate about sharing knowledge and experiences. I am working at Cotocus. I blog tech insights at DevOps School, travel stories at Holiday Landmark, stock market tips at Stocks Mantra, health and fitness guidance at My Medic Plus, product reviews at I reviewed , and SEO strategies at Wizbrand.
Do you want to learn Quantum Computing?
Please find my social handles as below;
Rajesh Kumar Personal Website
Rajesh Kumar at YOUTUBE
Rajesh Kumar at INSTAGRAM
Rajesh Kumar at X
Rajesh Kumar at FACEBOOK
Rajesh Kumar at LINKEDIN
Rajesh Kumar at PINTEREST
Rajesh Kumar at QUORA
Rajesh Kumar at WIZBRAND
