Step 1: Login to AWS Console
Step 2: Create a LINUX Centos 7 VM
Step 3: Login Centos VM. Help for Putty
Login and Putty Help Click here.
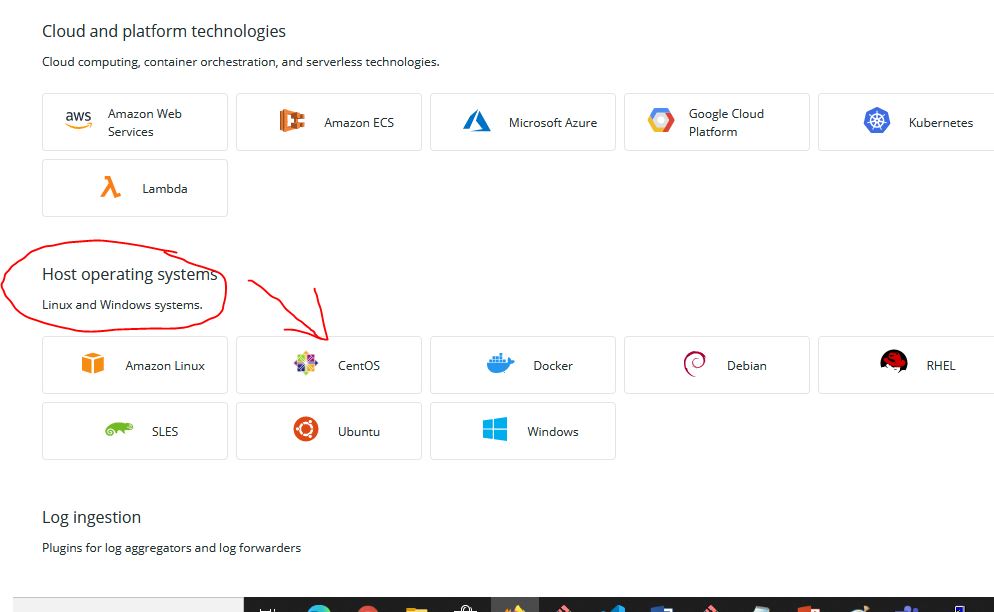
Step 4: NEWRELIC Add your data => Host operating systems => CentOS

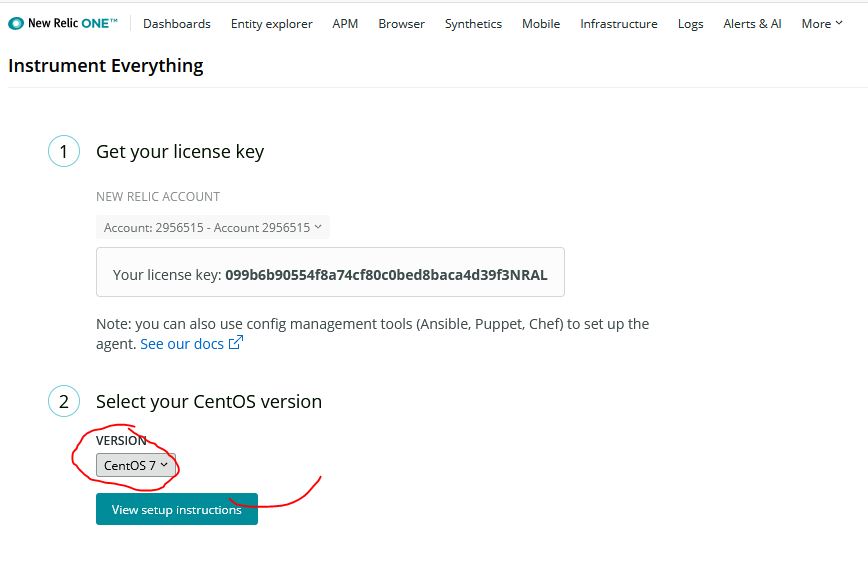
Step 5: NEWRELIC – Select your CentOS version

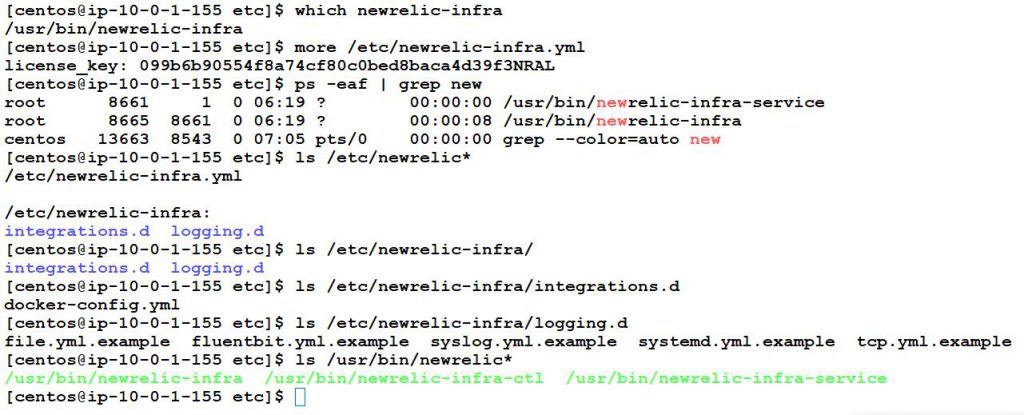
Step 6: Run a command into CentOs ssh session
$ which newrelic-infra
$ more /etc/newrelic-infra.yml
$ ps -eaf | grep new
$ ls /etc/newrelic*
$ ls /etc/newrelic-infra/
$ ls /etc/newrelic-infra/integrations.d
$ ls /etc/newrelic-infra/logging.d
$ ls /usr/bin/newrelic*Code language: JavaScript (javascript)
I’m a DevOps/SRE/DevSecOps/Cloud Expert passionate about sharing knowledge and experiences. I am working at Cotocus. I blog tech insights at DevOps School, travel stories at Holiday Landmark, stock market tips at Stocks Mantra, health and fitness guidance at My Medic Plus, product reviews at I reviewed , and SEO strategies at Wizbrand.
Do you want to learn Quantum Computing?
Please find my social handles as below;
Rajesh Kumar Personal Website
Rajesh Kumar at YOUTUBE
Rajesh Kumar at INSTAGRAM
Rajesh Kumar at X
Rajesh Kumar at FACEBOOK
Rajesh Kumar at LINKEDIN
Rajesh Kumar at PINTEREST
Rajesh Kumar at QUORA
Rajesh Kumar at WIZBRAND

