Step 1- Create a S3 Bucket with enable all public access.
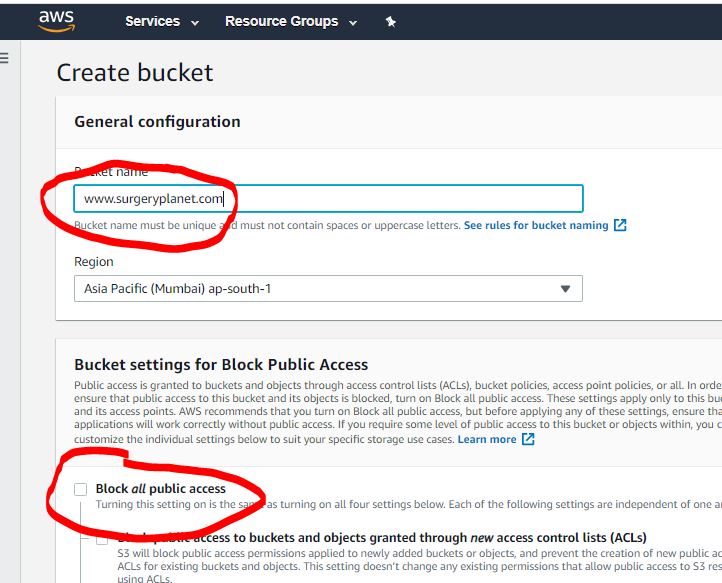
Step 2- Upload all static files using AWS console or AWS cli command line such as
$ cd www.surgeryplanet.com
$ aws s3 sync . s3://www.surgeryplanet.com
Step 3- Enable Bucket S3 Static Website Hosting
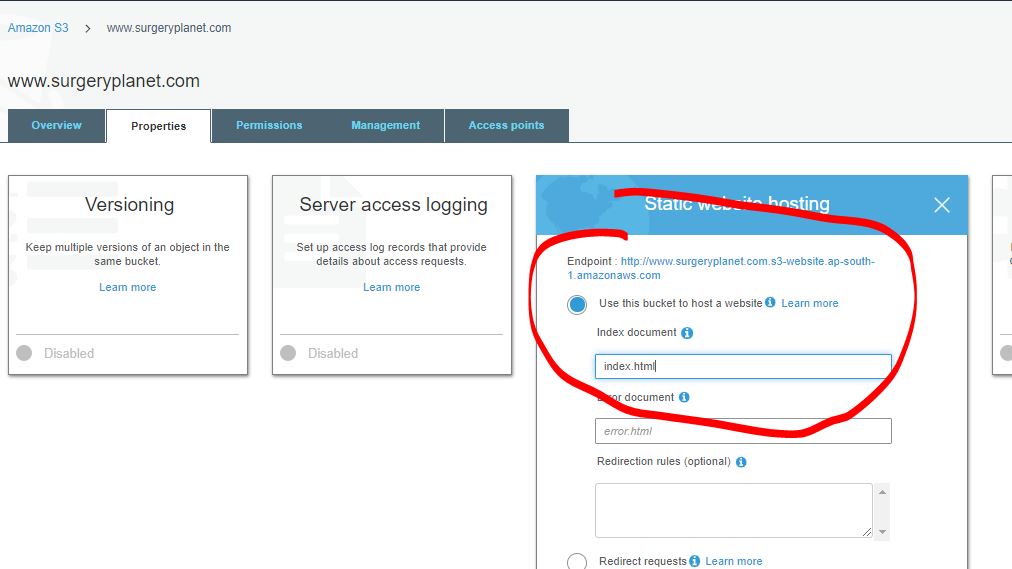
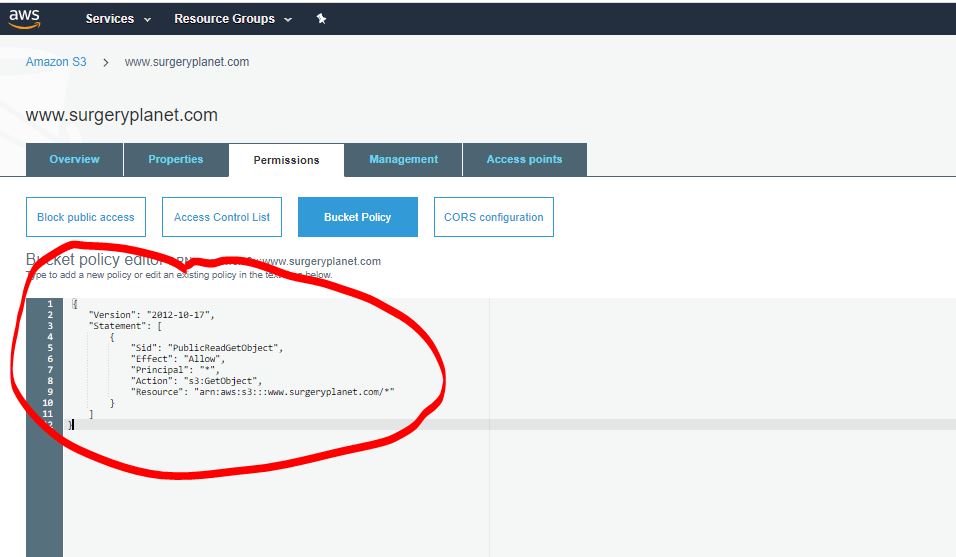
Step 4- Apply Bucket Policy to public
{
    "Version": "2012-10-17",
    "Statement": [
        {
            "Sid": "PublicReadGetObject",
            "Effect": "Allow",
            "Principal": "*",
            "Action": "s3:GetObject",
            "Resource": "arn:aws:s3:::www.surgeryplanet.com/*"
        }
    ]
}
Step 5- Create a S3 Bucket such as surgeryplanet.com and redirect to www.surgeryplanet.com
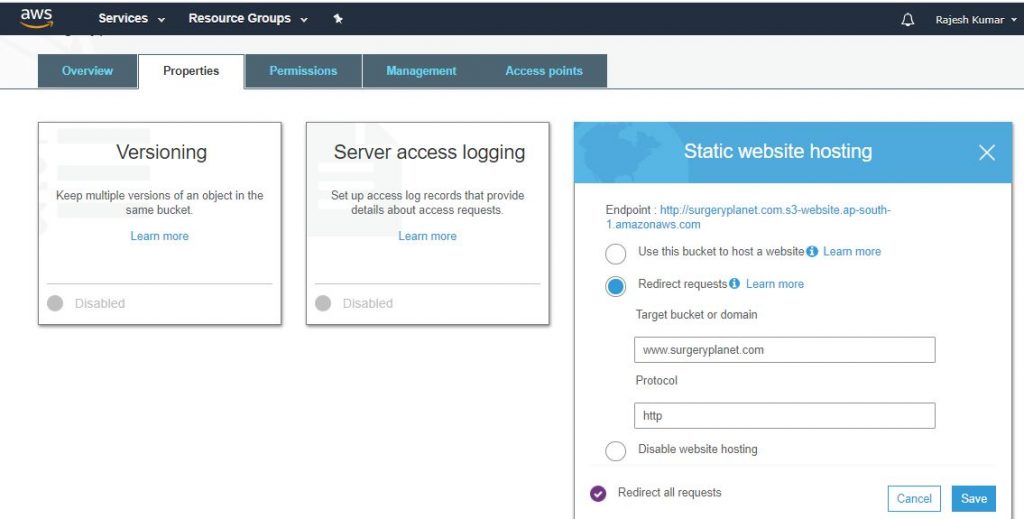
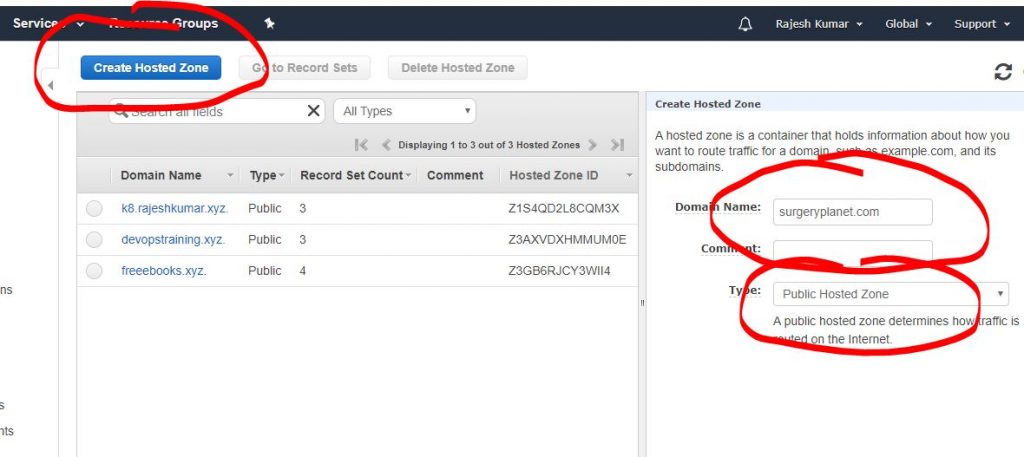
Step 6- Create a domain hosted zone in AWS route 53.
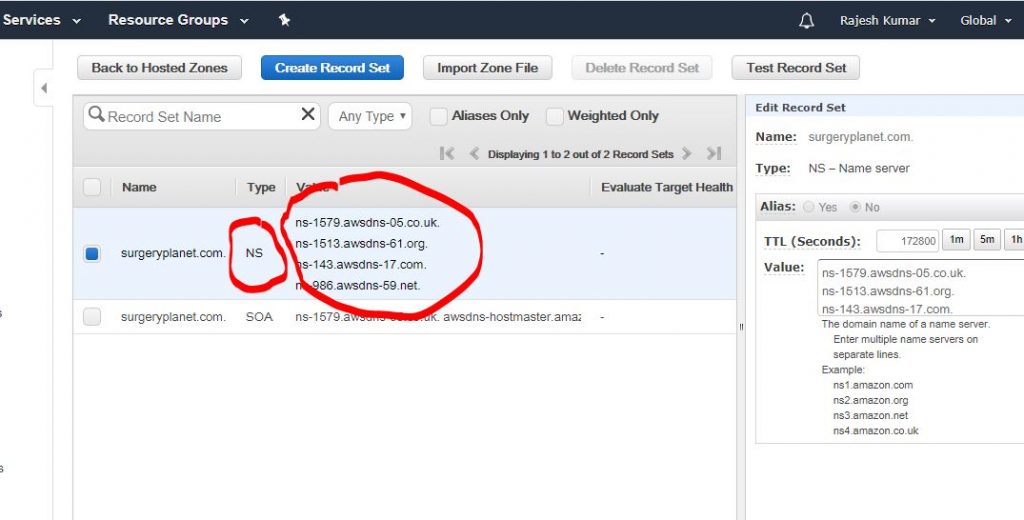
Step 7 – Gather NS record from Route 53 domain hosted zone.
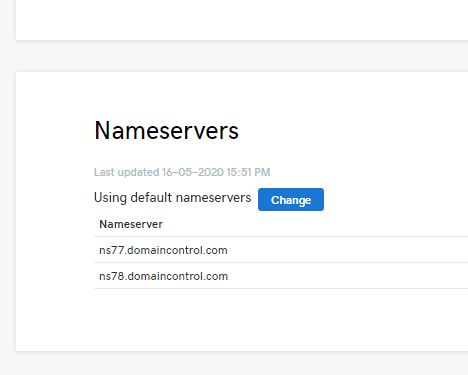
Step 8 – Apply Route 53 given records in Godaddy Domain DNS server
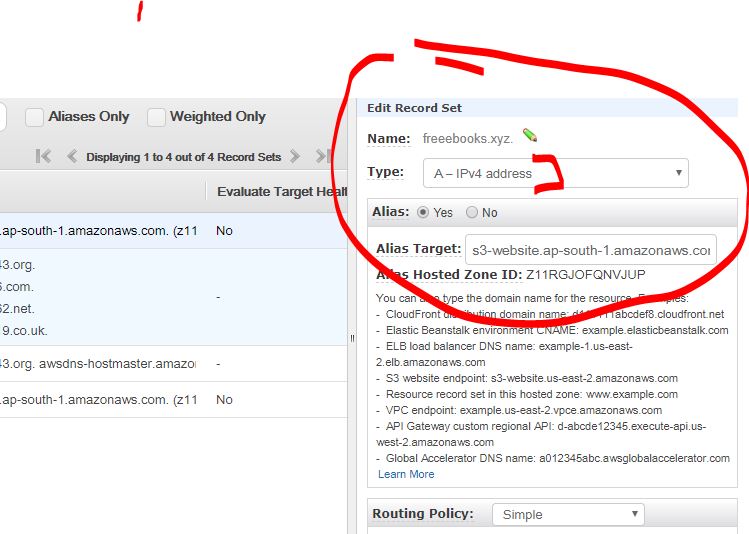
Step 9 – In Route 53, Add A records with S3 Bucket of
I’m a DevOps/SRE/DevSecOps/Cloud Expert passionate about sharing knowledge and experiences. I am working at Cotocus. I blog tech insights at DevOps School, travel stories at Holiday Landmark, stock market tips at Stocks Mantra, health and fitness guidance at My Medic Plus, product reviews at I reviewed , and SEO strategies at Wizbrand.
Do you want to learn Quantum Computing?
Please find my social handles as below;
Rajesh Kumar Personal Website
Rajesh Kumar at YOUTUBE
Rajesh Kumar at INSTAGRAM
Rajesh Kumar at X
Rajesh Kumar at FACEBOOK
Rajesh Kumar at LINKEDIN
Rajesh Kumar at PINTEREST
Rajesh Kumar at QUORA
Rajesh Kumar at WIZBRAND

